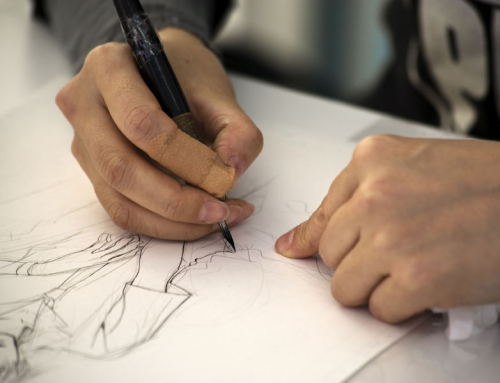
Guidelines are your friend!
If you’re having difficulty making your drawings look realistic, especially if you always seem to find mistakes in the placement or size of your features, then it’s a safe bet that you need to go back to the drawing board regarding guidelines.
Guidelines are just what you’d guess from the name: a light line that shows you where things go.
That being said, imagine drawing a portrait without them. You would have to focus on where to put the nose, how big to make it, and the shape of that individual nose all at the same time.
It’s a virtual guarantee that you’re going to be erasing lines not just once or twice, but multiple times for every feature you draw.
In no time at all, your drawing paper will be a smudgy mess.
How much easier would it be to know where the nose goes and how big it needs to be before you ever start drawing it?
That is the joy of guidelines. Never, never draw without them again.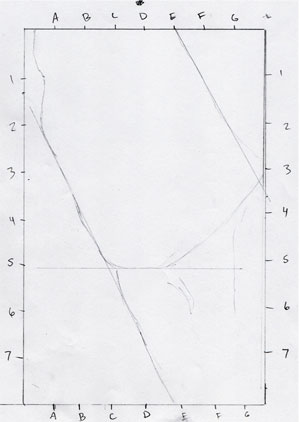
To start your drawing, you need to know how big to make the head and shoulders and where to put them on your page.
If you’re working from a reference photo, begin by building a graph around the outside of it on plain white paper.
Make a proportional frame on your drawing paper, then measure the height and width of all four sides and divide them into increments.
It doesn’t matter how many divisions you use, as long as there are the same number from drawing paper to reference photo.
The idea here is that you can use grid points to measure where things fall on the reference photo, then translate them to your drawing paper quickly and easily.
That system can only work, of course, if the grid points are the same on the reference photo and your drawing paper.
Label one set of points alphabetically and the other set numerically so that you can easily find where the external points of the large shapes fall. In the example here, the bottom of the chin is on D,5.
Once you have the large shapes graphed out using that grid, you can use a system of internal guidelines to place the smaller shapes such as the features of the face accurately.
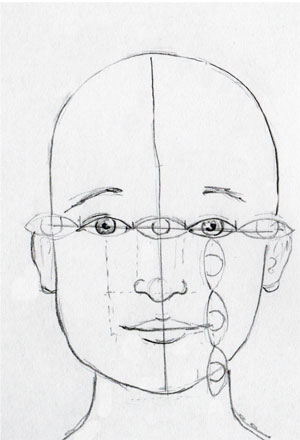
Everything on the face can be measured in terms of the length of one eye, so once you measure that, just jot down the placement for everything else from there.
The eyes fall right on the center of the head horizontally, and the nose is the vertical center.
From there, the eyes are one eye’s length apart, there is an eye length from the bottom of the eyes to the bottom of the nose, another eye’s length down from there is the bottom of the mouth, and about a half eye’s length from the bottom of the mouth is the bottom of the chin.
This startling illustration will help you to see how the features are aligned on the face in terms of eye length.
Note too, that the centers of the eyes line up with the corners of the mouth and the inner corners of the eyes line up with the outside of the nostrils.
Want To Learn More…
 Learn how to add life to your pencil portraits.
Did you know that a portrait can still look realistic and striking with very little blending by paying attention to shapes and lighting?
Something as simple as that can make a huge difference in your drawings and we can show you plenty of helpful techniques to add life to your pencil portraits.