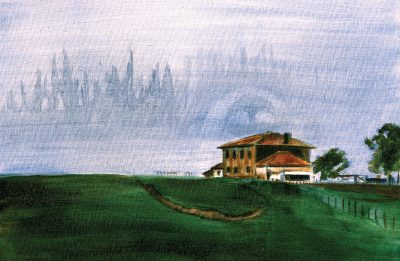
Glazing is the technique used by the great masters of the Renaissance.
In glazing, thin coats of paint are layered one on top of another so that the colors underneath are still visible. Think of glazing as stacking pieces of colored glass on top of another.
It is slow, because each layer needs to dry completely before the next glaze can be added on top, or the paint would be disturbed.
It may take two days or more before a layer is dry enough to glaze the next pass on top, and a painting can take twenty to forty layers or more to be complete. That is completely up to the artist.
However, if you want high realism, depth of color, and the most traditional approach to oil painting, this is the style to study.
Before you start to glaze in colors, you need to have a very exact idea of where everything goes in your composition. This means starting with a very accurate drawing, on top of which you can build your grisaille, or “gray picture.”
The grisaille is traditionally tones of gray, but it doesn’t have to be; you can use any high-value color.
Ochre and white or red and white work equally well. Just make sure the grisaille is light colored, or the painting will become too dark with subsequent layers of color glazed over the top.
Also, don’t forget that crucial law of oil painting: Fat Over Lean. In other words, layers of paint with a lot of oil (lamp black, ivory black, and most other dark colors) must be painted over lean layers, or in time, the paint will crack.

Lean colors are those thinned with turpentine or light colored. Because the basis of your painting needs to be kept lean, it is vital that you keep that grisaille light colored and thin, not fat.
Once the grisaille has dried for a few days and is completely dry to the touch, you can varnish it with a thin coat of retouch varnish or liquin. Let that dry again, then you can start glazing in color.
To keep it as simple for yourself as possible, start with a limited color palette–three or four colors. Remember to keep each layer very thin and transparent–keep that colored glass analogy in mind as you work.
And don’t be tempted to press forward with a new layer until the previous one is totally dry. Because this takes so much time, it’s a good idea to have multiple canvases to work on at the same time.
As one dries, another will be ready to paint on. The other challenge of glazing is to keep each pass extremely smooth. This enables the colors to layer evenly and avoid a build-up of one single color.
But keeping paint smooth in oil painting can be very difficult to do. It may help to use a soft sable brush or a fan brush to smooth out color, or even a roller brush.
After using thin glazes to establish large, unifying areas of color in the background and foreground, you may want to scumble in additional paint. Scumbles are applications of opaque paint, and are used to add body, texture, highlights, and details to a glazed painting.
Scumbles usually have a lot of white in them,
and remember that white is lean, so in order to avoid cracking, you’ll need to add oil to your scumbles. (Fat over lean).
Want To Learn More …

We have created Oil Painting Mastery so that with this simple step by step oil painting lessons you’ll be able to create masterpieces in record time – and this goes regardless of your previous experience.
With clear (and fun) instructions on how to draw … you’ll learn at your own pace in the comfort of your home.

