
 Login
LoginPainting Flowers
Course Overview and Basics
Always paint on 100% cotton rag paper.
If the paper isn’t in a block, you’ll need to stretch it for ten minutes in cold water and fasten it to a backing, such as plywood or gator board.
Staple it down and let it dry. The paper will shrink, or “stretch” as it dries and will be much easier to paint on than cheap paper that buckles and tears.
Class 1
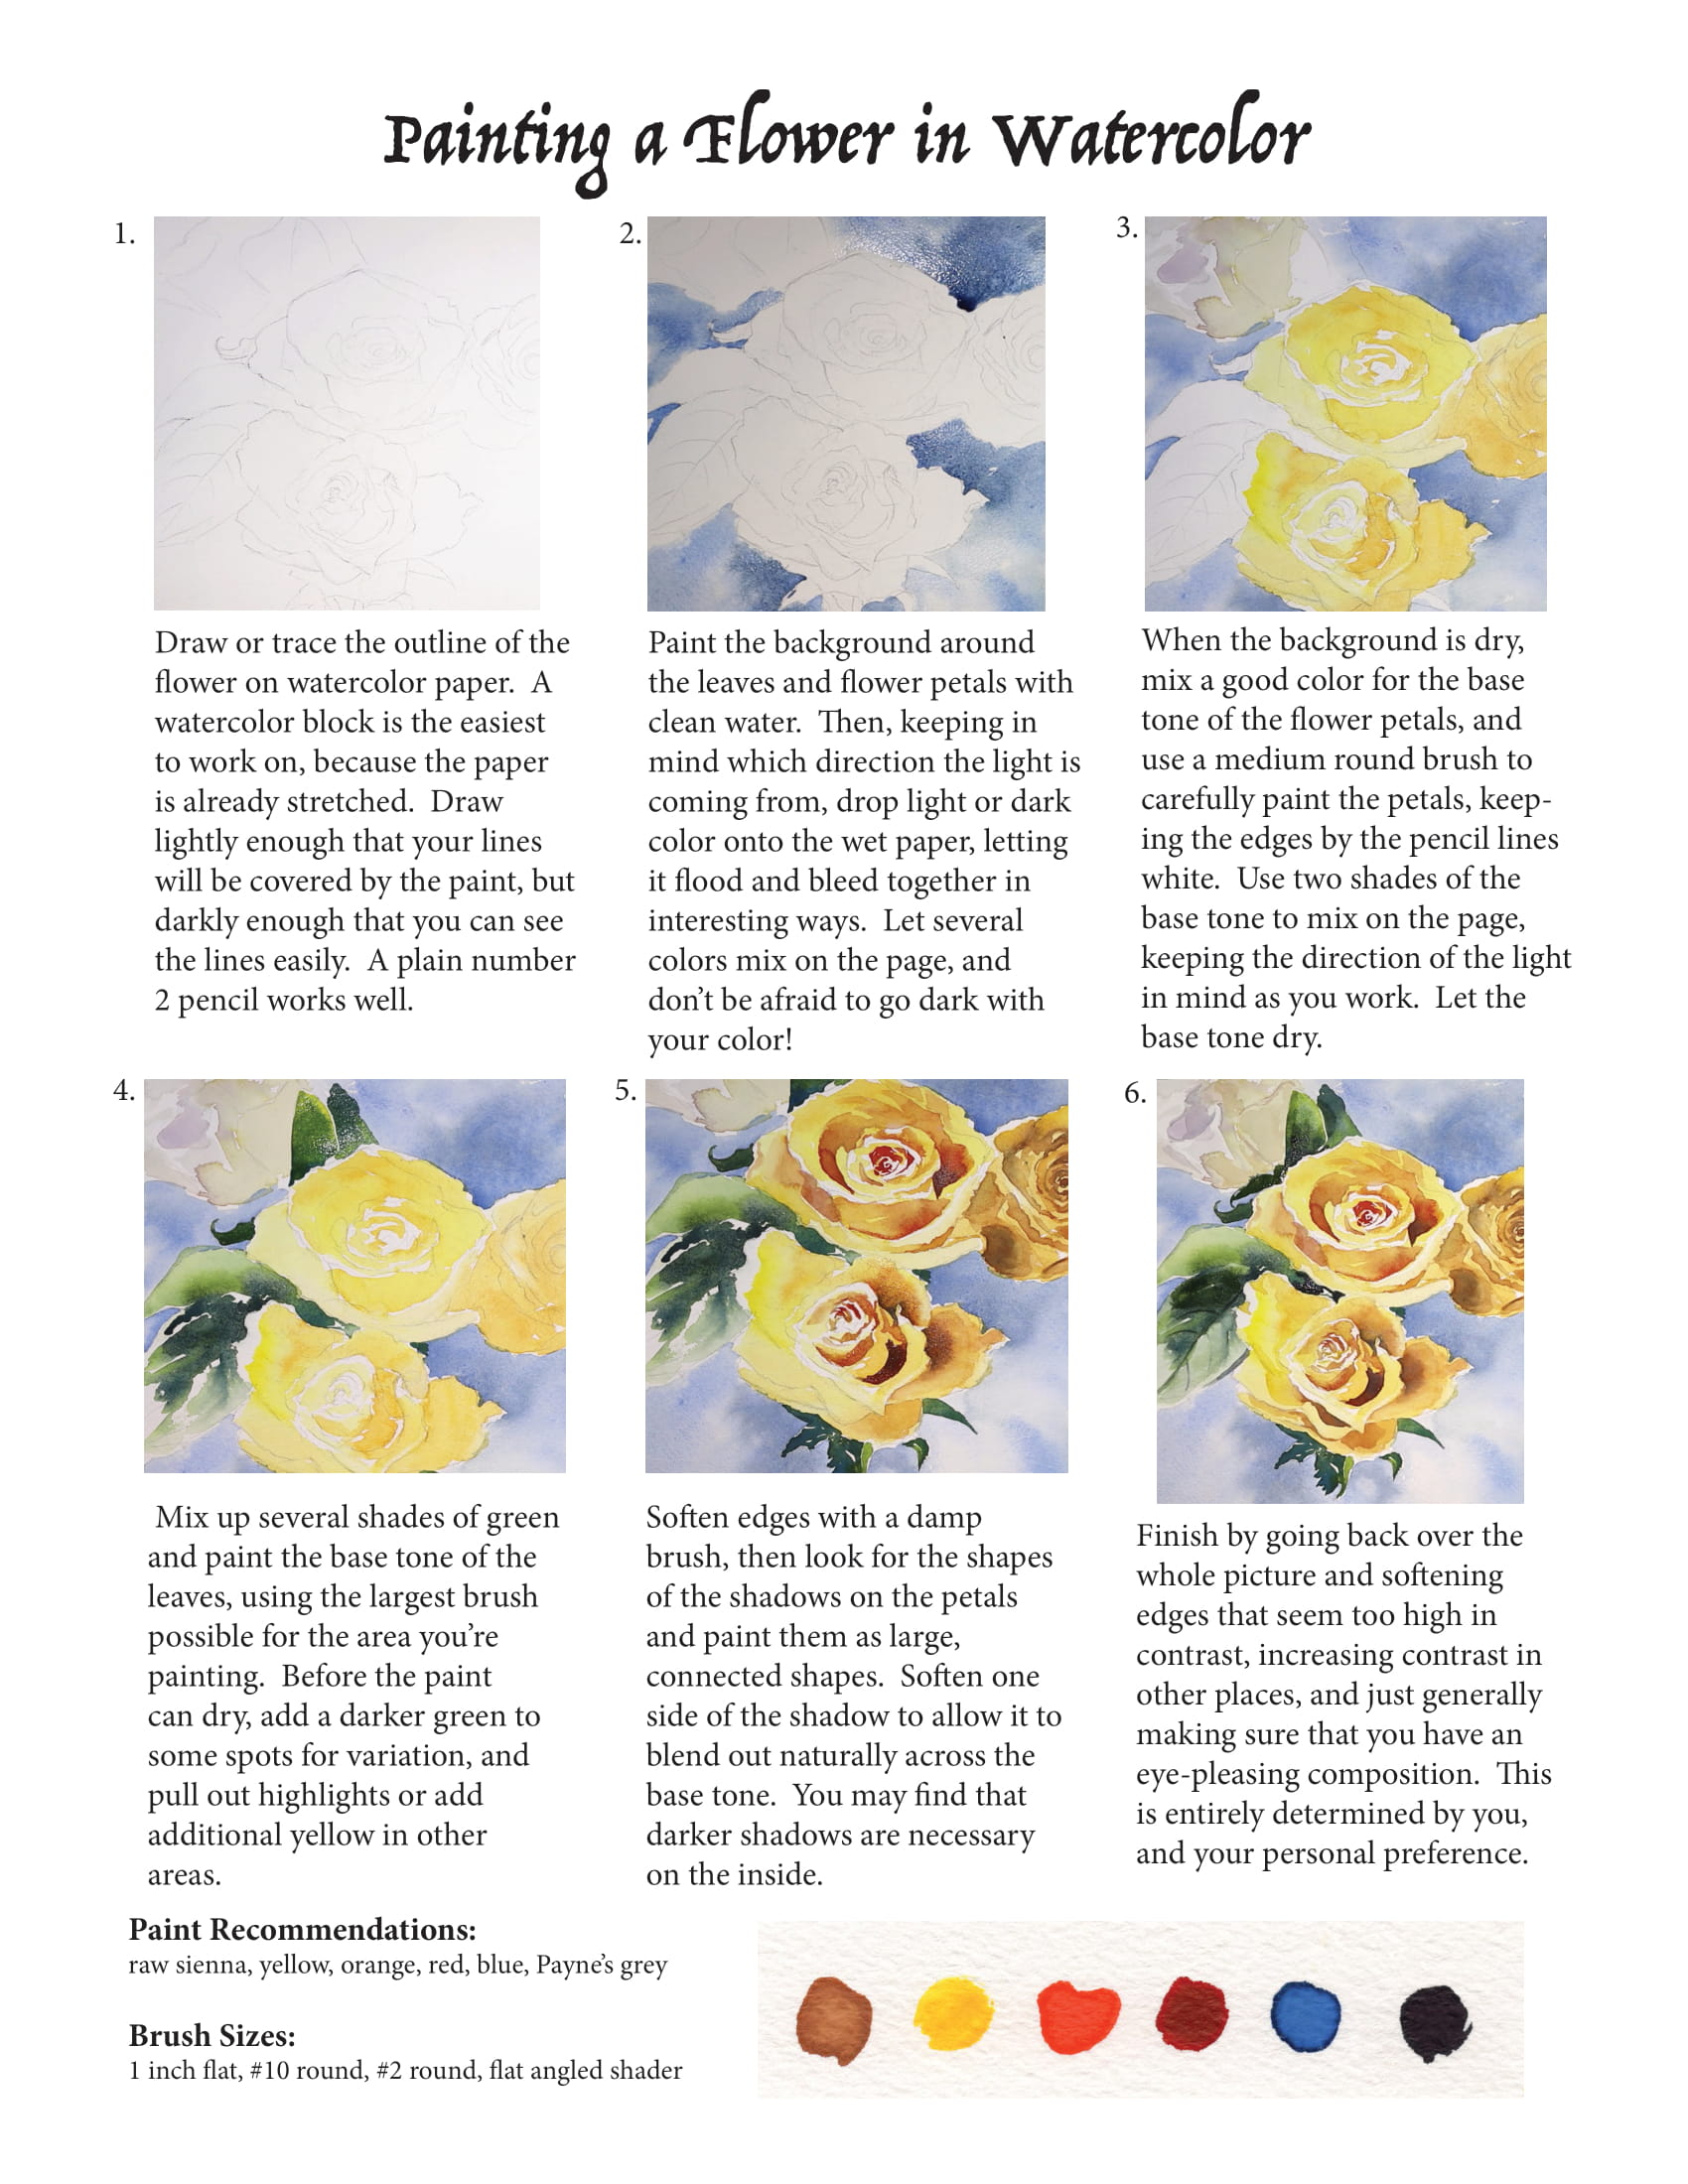
When the paper is stretched and dry, draw the outline of the flowers with a 2B school pencil.
You should be able to see the lines easily, but they shouldn’t be so dark that you can’t erase them. If you’re using the reference that comes with the course, you can start by simply drawing the oval shapes that form the outside shapes of the roses, then add more detail to the petals and
leaves. Work on the drawing until you’re completely satisfied.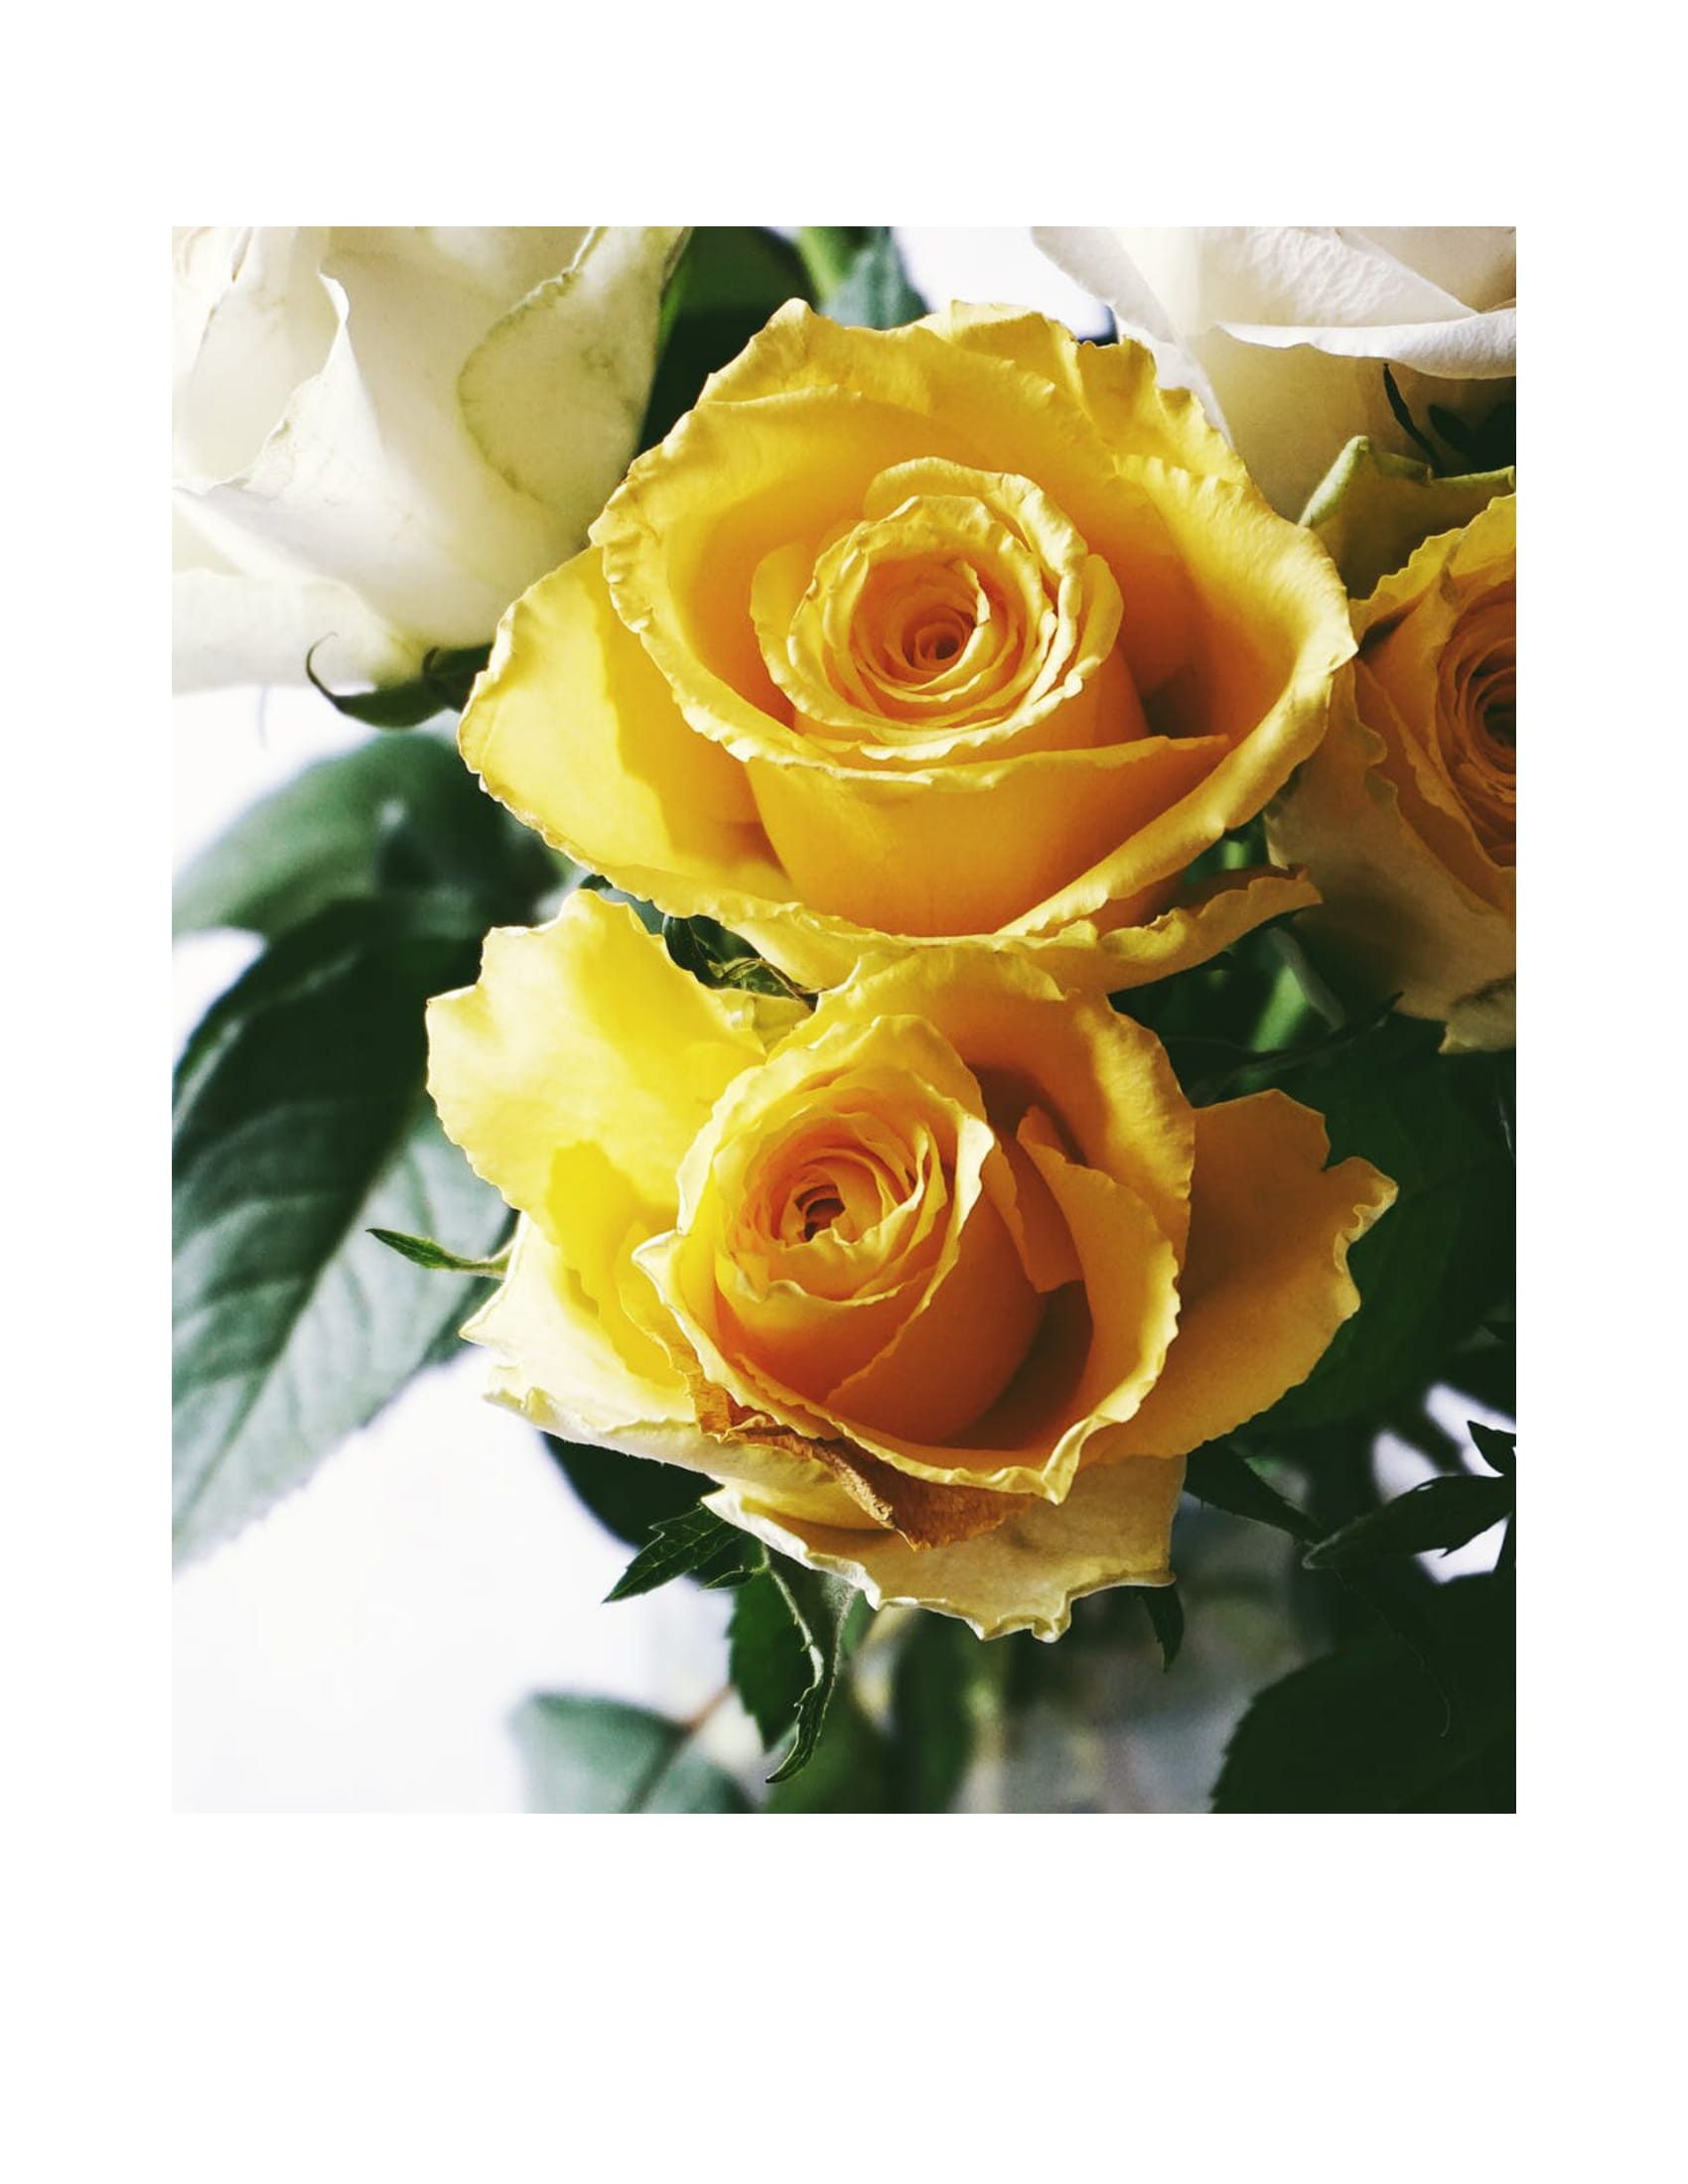
Class 2
Paint the background with clean water, taking care around the edges of the roses and leaves.
While the background is still wet, flood into it with light and dark blue, letting the darks mix together and bleed into interesting textures.
Contrasts are more visually appealing than flat, even tones, so don’t be afraid to keep some areas light, others dark.
Let the background dry.
Class 3
Next, mix up a good base color for the yellow roses.
Test the color against your reference on a piece of scrap paper, then use a medium round brush to paint the petals. However, it’s very important to paint them as shapes of color, not individual petals, or your painting will tend to look like a paint-by-number.
If you can’t see the shapes of color on the flower, squint your eyes and examine the reference. You should see the base tone, highlights, and the very dark shadows inside the petals.
As you paint the base tone, work around the highlights to keep them light, and let two slightly different shades of yellow mix on the page, keeping the direction of the light in mind as you paint. The lighter shade of the base tone will be on the upper edges of the petals, catching the light. The
darker base color will be on the lower half of the petals.
Class 4
Mix up about three shades of green so you can start work in the leaves.
You’re still painting the base tone first, but after painting a leaf, add the darker green color to the wet paint for variation.
The greens will mix together in this wet-on-wet technique, and be more realistic than using one flat color. You can also blot areas of the leaves with paper towels before the paint can dry, or paint some areas with a bit of yellow to make a lighter green.
Let the leaves and flowers dry completely.
Class 5
The edges of the petals and leaves that were left white will probably be too stark, so you’ll need to soften them up with a damp, angled shader brush.
Gently rub over the edge, then blot with a paper towel.
Let the softened edges dry.
Class 6
The final step is adding the shadow shapes.
Mix and test the color for the shadow against the reference until you’re satisfied, then squint at the photograph and focus on seeing the shapes of the shadows as one, continuous shape, versus several disconnected shadows on every petal.
You’re working to simplify the shape, not to capture every element of the photograph. The shadows will have variations of tone within them, so that there will be both darks and lights within the shadow shapes.
Paint the lighter shade of the shadow first, then drop in the additional darks when the color is still damp.
Class 7
The basic principle of watercolor is that you get soft edges when you paint on a wet surface, and hard, well- defined edges when you paint on a dry surface.
You’ll need to keep this in mind as you paint your roses, which have both soft and hard edges.
Try to plan out where you’ll need to paint wet-on-wet and where you’ll need to let the paper dry before you start painting.
This is a difficult skill to develop, so be patient with yourself and don’t expect to do it perfectly the first time. Your real improvement will come through repetition, which will eventually develop into instinct, until at last, you’ll just know when the paper is right for the technique you
need.
Class 8
For the white rose, the process is exactly the same, but you’ll need to color match the violet and cream hues that you see on the reference.
Still, start with a base tone, avoiding the highlights, let it dry, and soften the highlights, then add the shadows.
Because the white rose isn’t the point of interest of the composition, you don’t want to have too many contrasts, or it will tend to come forward and steal attention.
Reference Material …
Click here to download reference image
Click here to download step by step instruction handout
To save these to your computer simply right click on the link above and choose
the option to “Save As”. Save the file to your desktop for easy access.
 If you wish to download the files to your desktop, simply right click the link below and select ‘save as’
Then select the location you wish to save the files to (either your DESKTOP or MY DOCUMENTS e.t.c.)
Once finished, simply unzip the files (PC use winzip, MAC use stuffit) and your files will be there.
All written material can be opened as a PDF.
All videos files can be opened with VLC Media Player.
Select your download option below …