
 Login
LoginDrawing Portraits
Course Overview and Basics
In this course, we will learn all about drawing a portrait.
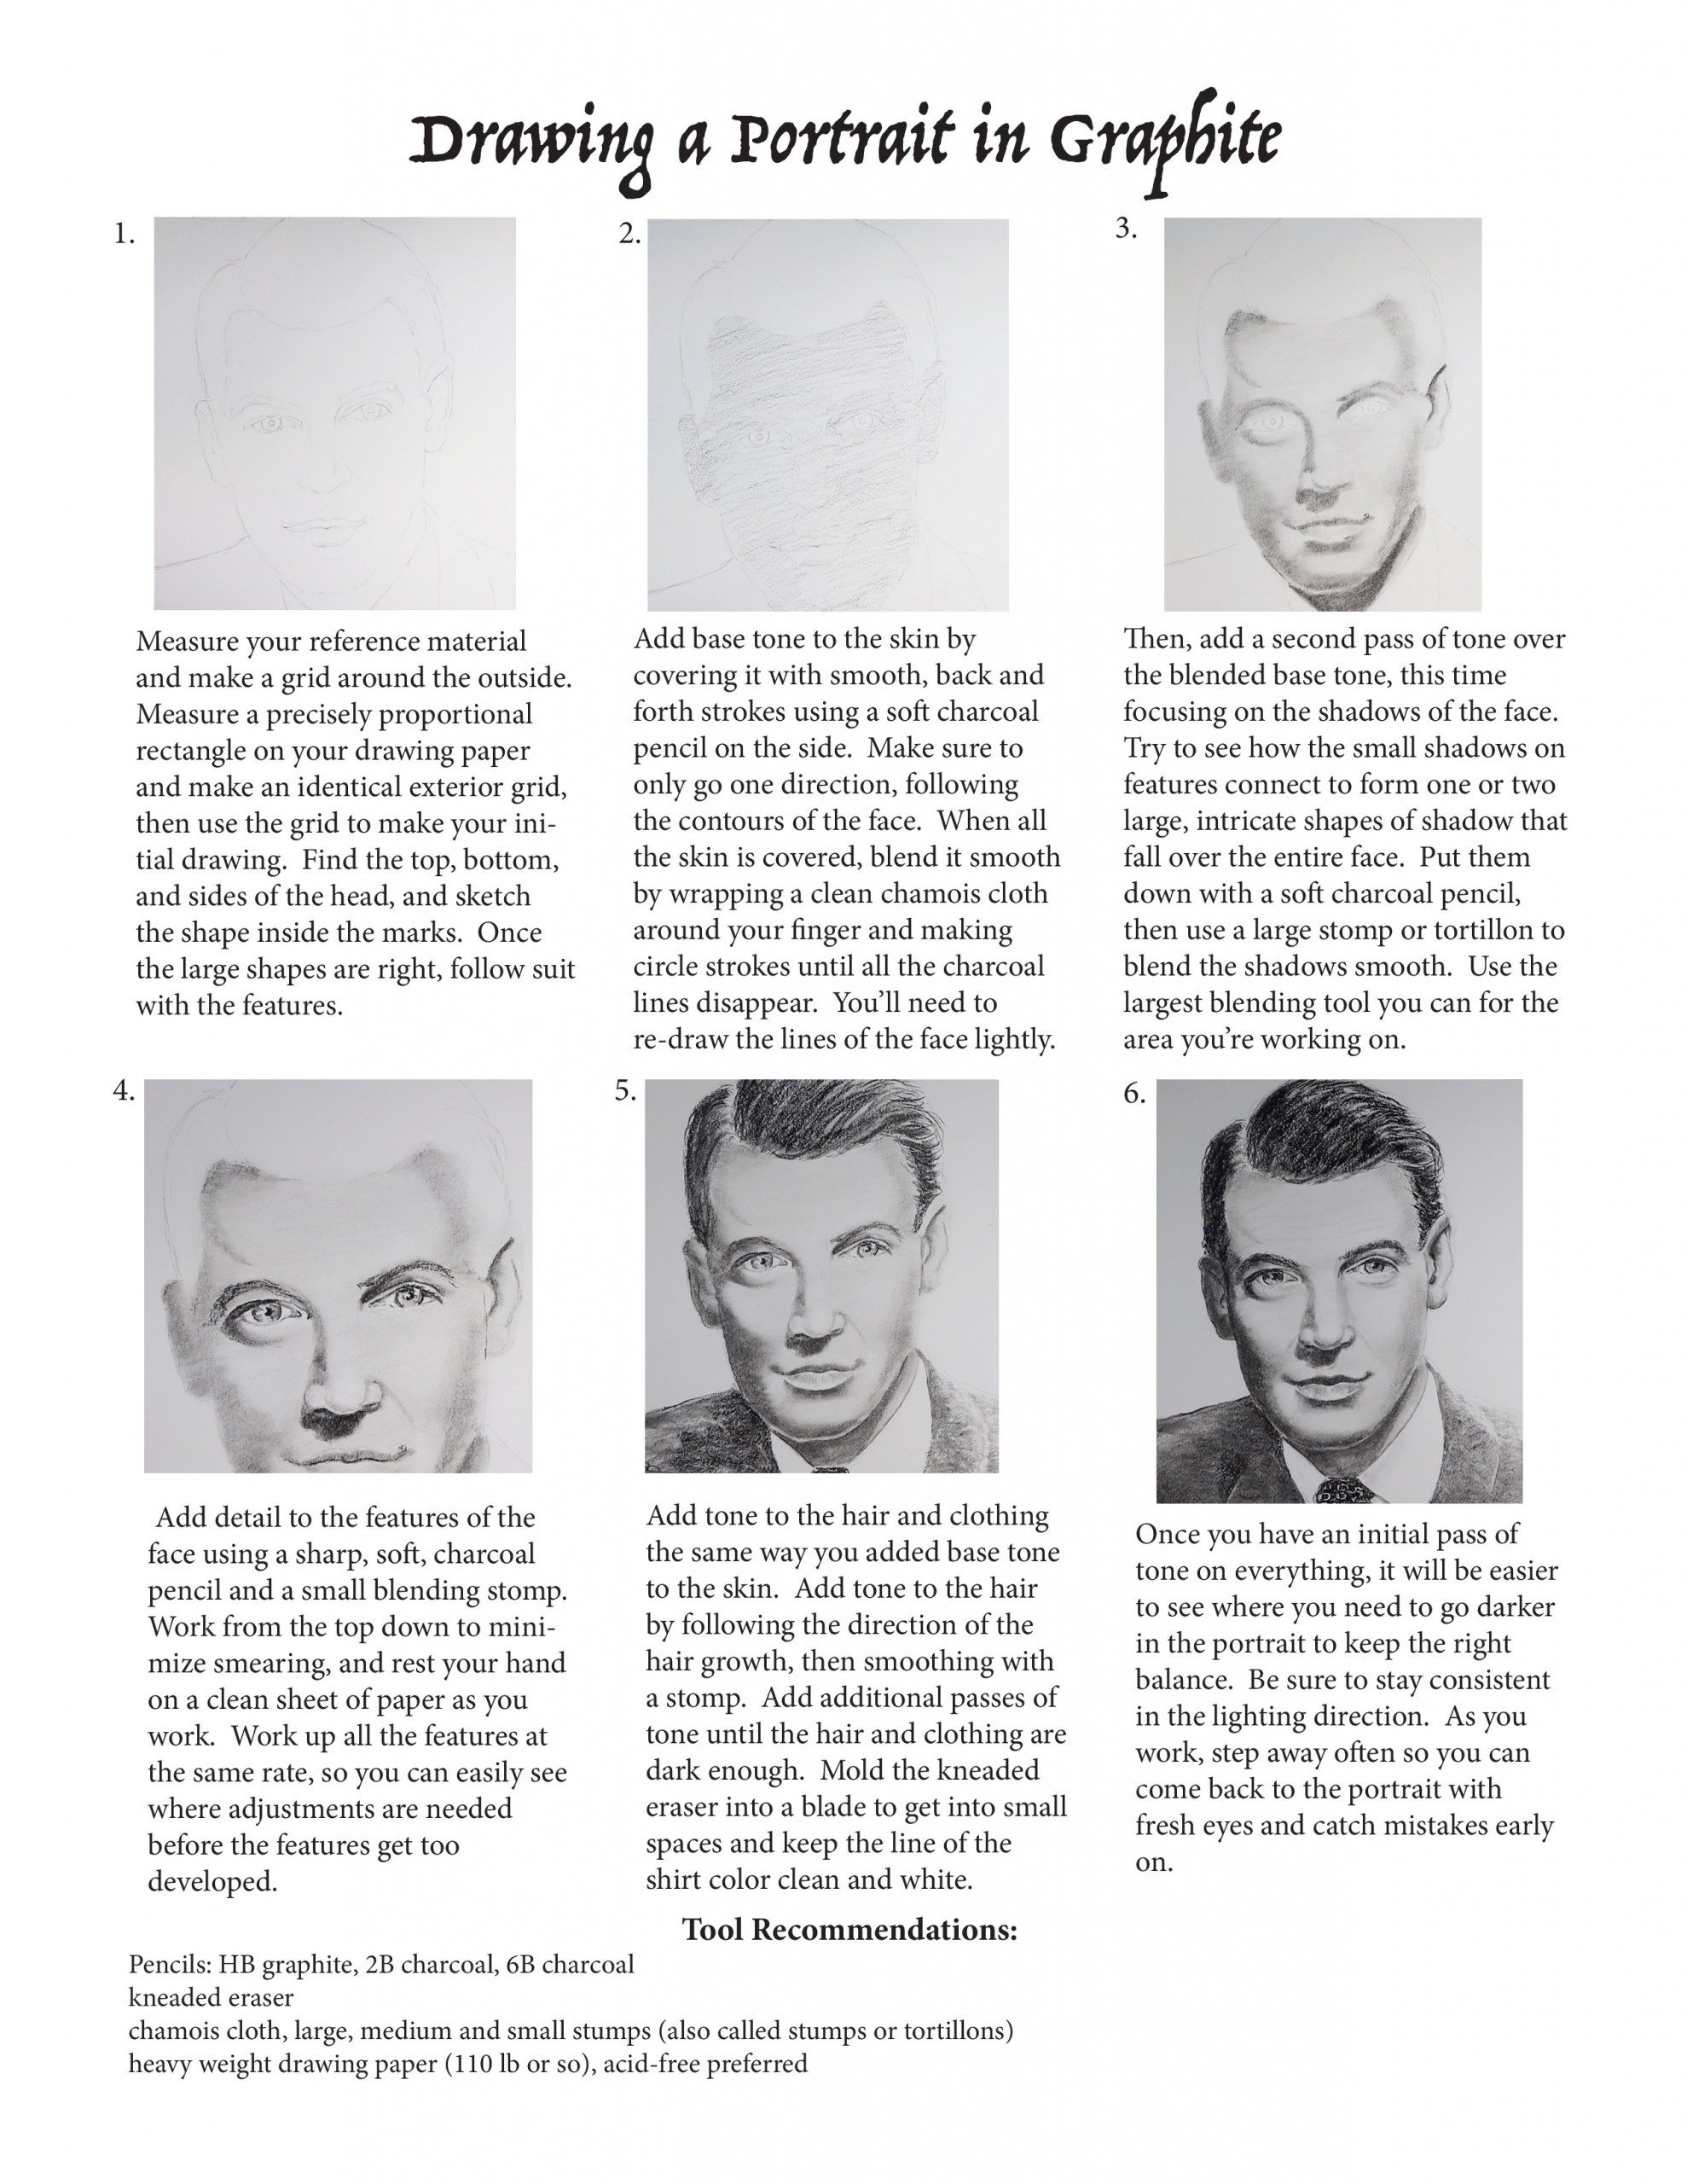
Start by choosing a quality drawing paper to work on. Medium toothed paper (meaning, not too smooth, not too much texture) will hold the tone well, allowing you to build up very dark darks and pull out clean highlights.
Choose something about 140# weight so it will hold up to repeated erasing
Class 1
In portrait drawing, the key is, above all, accuracy. That can be difficult for any artist, but especially the beginner, so give yourself a break by making an exterior grid to help you out.
Print out the reference and measure it precisely. Then, measure perfectly evenly spaced increments around the height and width. The easiest way to do that is to find the center of the length, and mark it (two halves). Divide that length in half and mark that (quarters).
Divide that in half again, (eighths), and one more time (sixteenths).
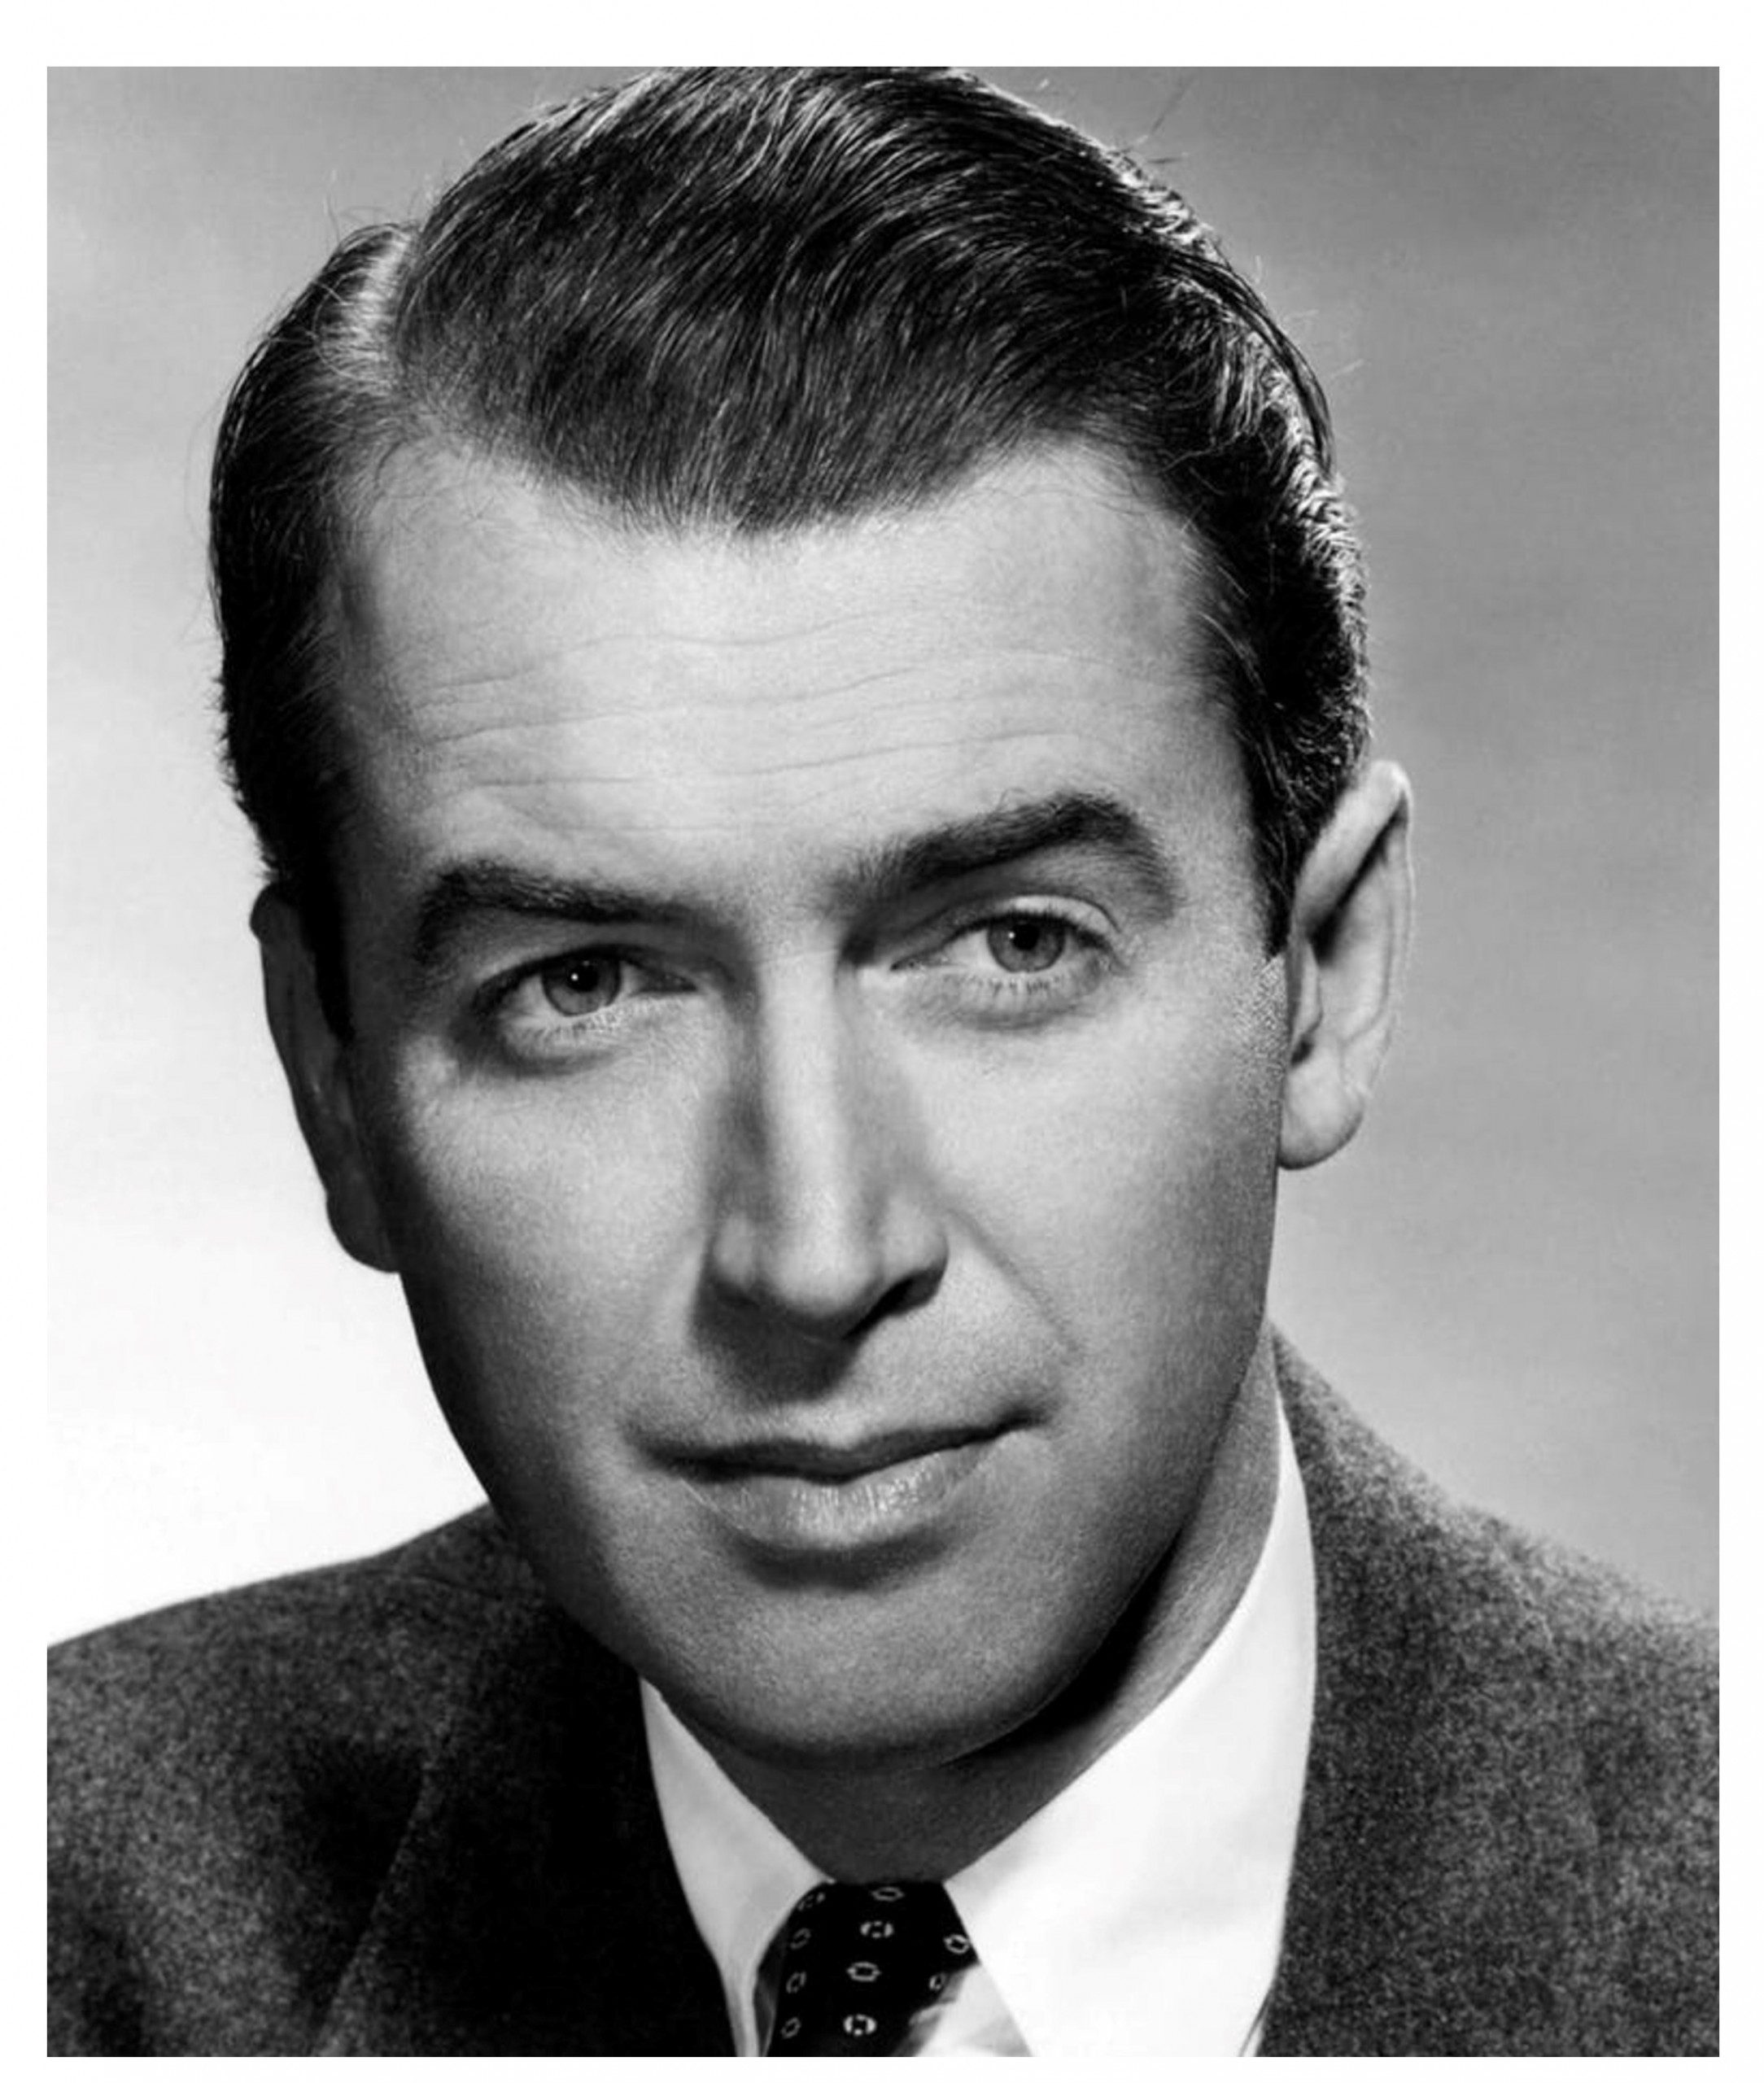
Reference Image
Class 2
When you have the measurements around all four sides of the reference, build a perfectly proportional rectangle on your drawing paper. It doesn’t need to be the same size, only the same proportions to the reference. Use the same system to measure increments along all four sides of the drawing frame, and then label the two sets of increments the same way.
For example, the short side of the reference and drawing frame can both be labelled “A, B, C, etc.” and the long sides “1, 2, 3, etc.” With these increments labelled the same from reference to drawing frame, you can easily place the elements of the portrait.
Reference Image
Class 3
To use your grid, use a triangle to find the top, bottom and sides of the head. Each point will coincide with a number and letter on the grid; for example, the bottom of the chin might fall on 5C.
If that were the case, you would simply make a mark on your drawing paper at 5C as well, and then you could be confident that the bottom of the head was in the right place.
This process is somewhat time consuming, but the payoff is that if you make your measurements carefully, you can be sure that your portrait will look like the reference in the end.
Work from the large shapes to the small, using the grid to give yourself reference points for as many points as you need. When you have enough guides, it’s quick and simple to sketch the shape within those guides.
Reference Image
Class 4
Once you have the large shapes of the head, neck and shoulders in place, you can use the grid to place the features of the face, or you can use a scrap piece of paper to place all the features in terms of eye length.
Measure one eye length, and mark the measurement on your scrap paper.
Then, place the second eye one eye length from the first eye. The bottom of the nose is an eye-length down from the bottom of the eye, and the bottom of the lip is an eye-length down from the bottom of the nose.
Those are approximate, so make sure to make your own eye-length based measurements using the specific reference you’re working from as a guide for the drawing.
Reference Image
Class 5
When you’re satisfied with the basic drawing (the portrait should be recognizable), you can start to add tone to the skin. Hold the pencil on the side and make smooth, back and forth strokes that overlap slightly. Everything should be covered except the eyes.
Blend the skin tone smooth with a chamois cloth, pressing hard and making circle strokes to hide all the pencil lines.
Reference Image
Class 6
Then, add a second pass of tone to the skin, this time focusing on the shadows in the face and neck.
Squint at the reference to see the shapes of the shadows better, then add them in connected pieces, still holding the pencil at the back to access the entire side of the tip.
Blend the shadow shapes smooth with a large stomp or tortillon, using the largest blending tool possible for the area.
Reference Image
Class 7
Next, you can start adding details to the face. Darken the lines in the eyes, nostrils, and line between the lips with a sharp, soft pencil. Then blend one side of the line out with a small stomp or tortillon.
You want sharp contrasts, but minimal lines, so it doesn’t look too cartoonish.
Reference Image
Class 8
Add tone to the hair with a very soft graphite pencil, or a charcoal pencil. Work with broad strokes, always working in the direction of the hair growth.
Blend over the top with a large stomp, then pull out a few highlights with a kneaded eraser and add additional flyaway hairs around the outside with a sharp, hard pencil.
Reference Image
Class 9
Add tone to the suit using a pencil on the side. To keep the texture of the suit different from the skin, blend the first pass, then cross-hatch a second pass of tone over the top and don’t blend it at all, or blend minimally.
Cross-hatching means making lines in one direction, then crossing over the top of them with lines that go perpendicularly.
Reference Image
Class 10
Finally, look over the portrait as a whole and see where you can add more realism by pulling out highlights around the bottom of the nose, edge of the chin, and anywhere else that has a strong edge of contrast.
You can darken the shadows if they need to be as well.
Remember, you can always go darker, but it’s very hard to lighten areas that were made too dark.
So, work in layers, darkening the portraits in passes all together rather than focusing on a single feature and then moving to the next. This way, you can see how the features balance each other and where they need adjustments before they’re worked up too far to make any changes.
Reference Image
Reference Material …
Click here to download reference image
Click here to download step by step instruction handout
To save these to your computer simply right click on the link above and choose the option to “Save As”. Save the file to your desktop for easy access.
 If you wish to download the files to your desktop, simply right click the link below and select ‘save as’
Then select the location you wish to save the files to (either your DESKTOP or MY DOCUMENTS e.t.c.)
Once finished, simply unzip the files (PC use winzip, MAC use stuffit) and your files will be there.
All written material can be opened as a PDF.
All videos files can be opened with VLC Media Player.
Select your download option below …