
 Login
LoginDrawing Dogs
Course Overview and Basics
Start with a quality drawing paper.
You want a medium tooth, fairly heavy paper that will stand up to erasing, but will also blend smoothly and hold tone well. A good choice is 140# drawing paper, but you can experiment to see what you prefer.
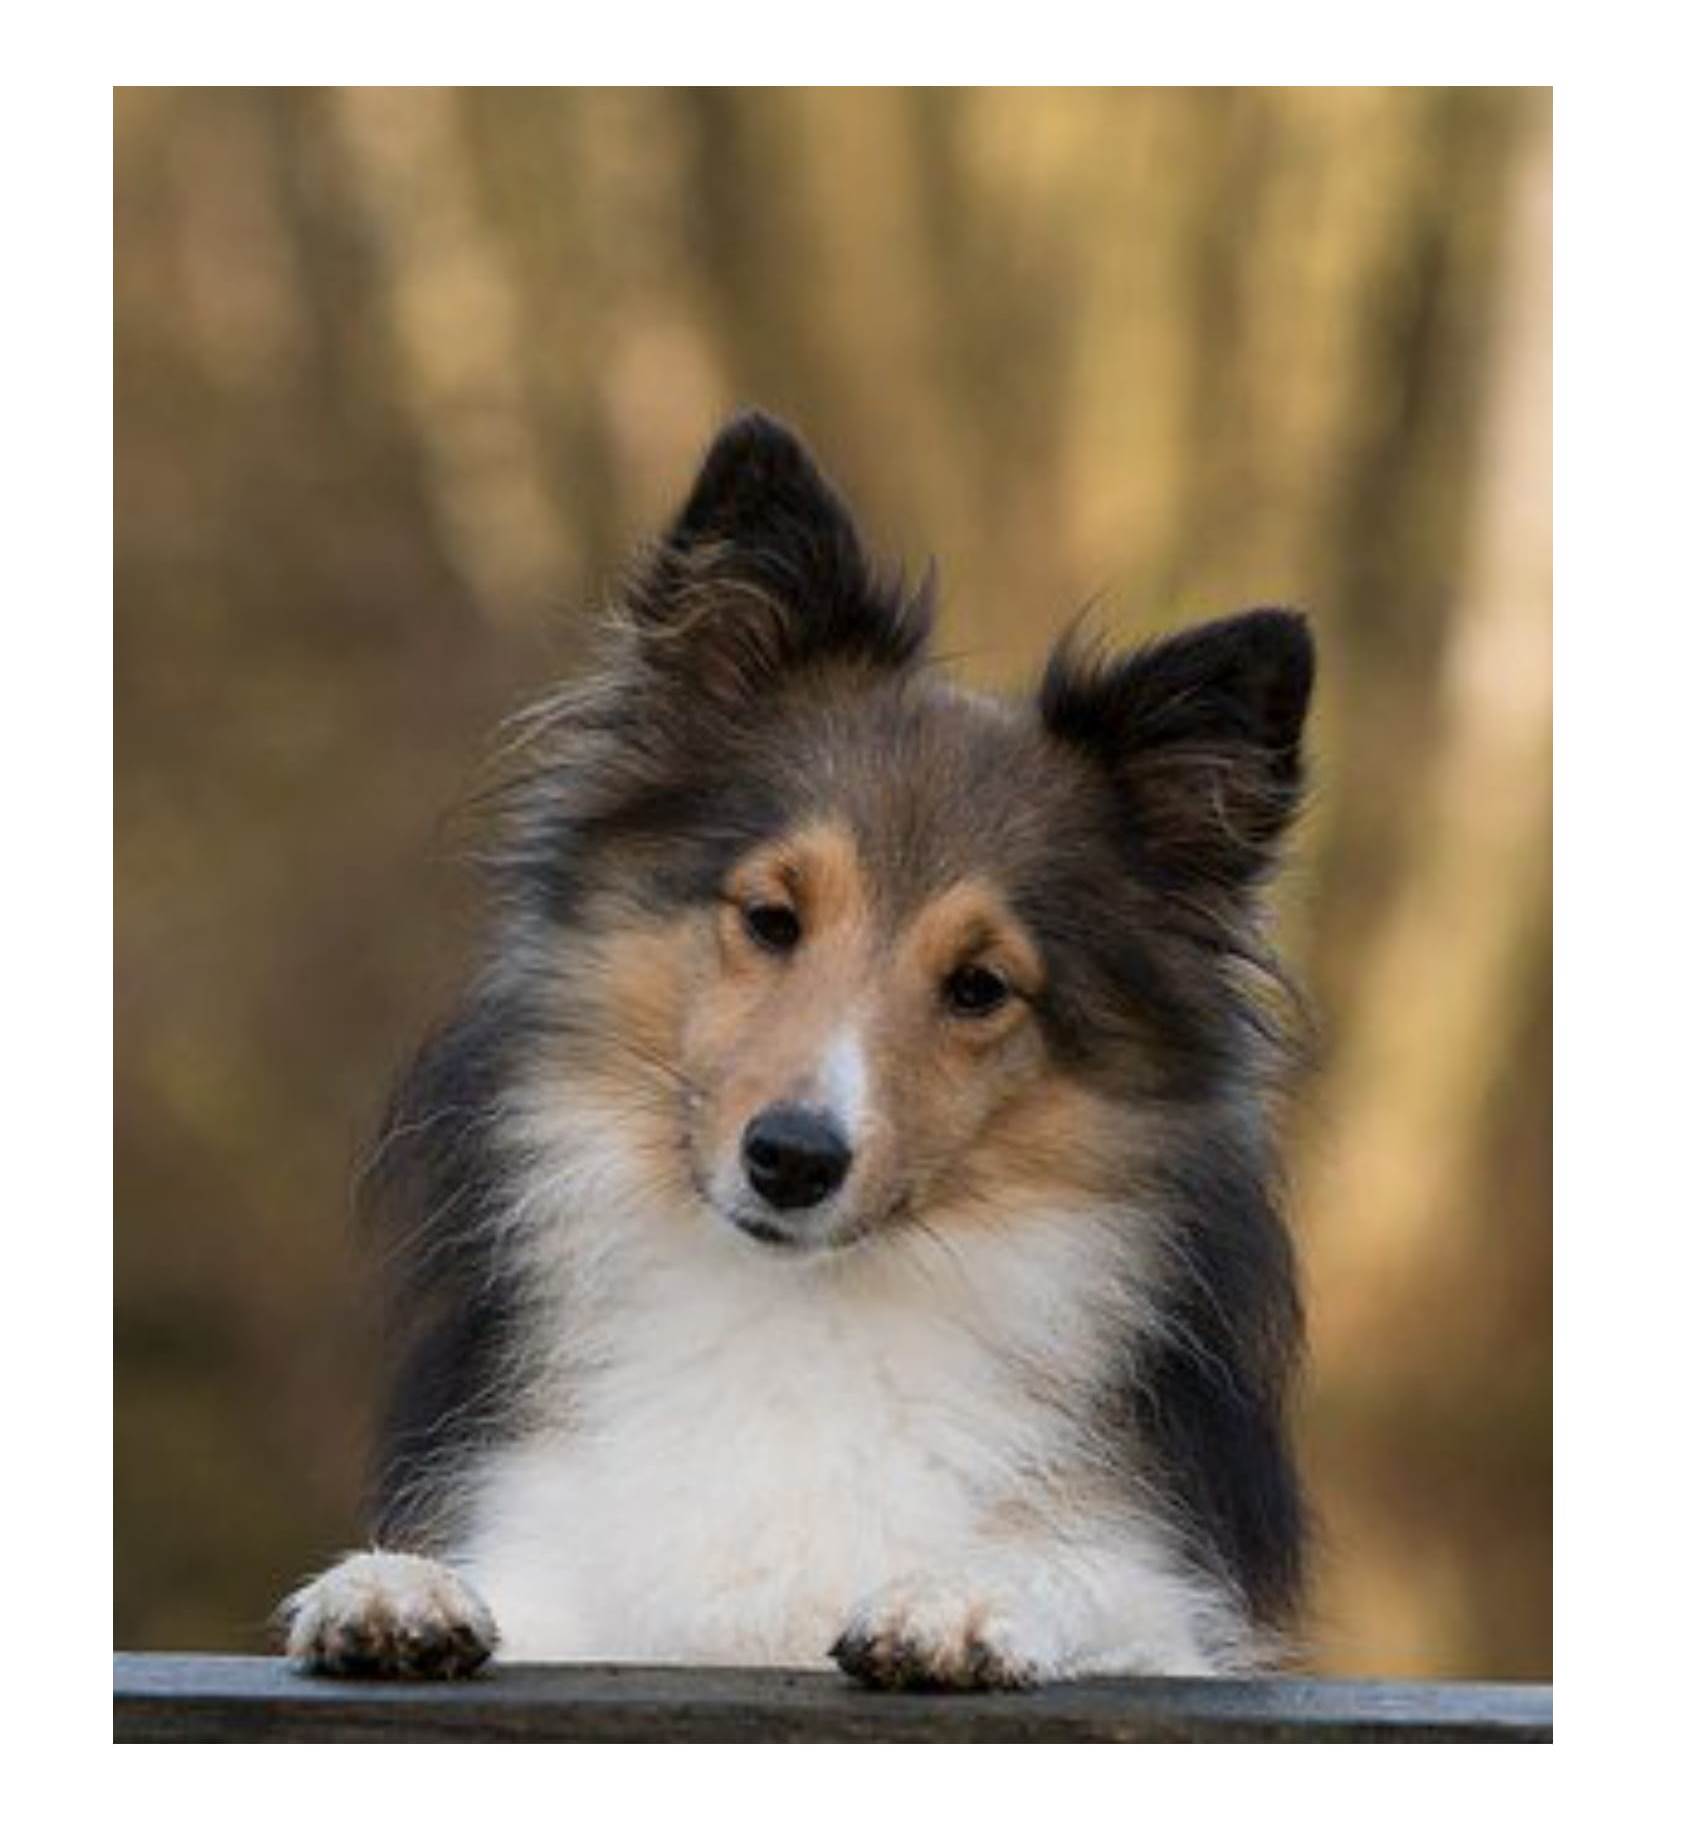
Next, get a reference picture to work from, or print out the reference included with this course. The dog included is fairly basic, which is good for a beginner.

Class 1
Sketch the basic shape of the dog with a light, medium soft pencil.
An HB school pencil works just fine for this step.
Get the outer egg-shape of the entire head and body first, then add the ears and the face and paws. Always work from large shapes to small.
Class 2
When you’re satisfied with your sketch, indent any thin white hairs that you want to preserve in the fur by pressing into the paper with a stylus.
A stylus is technically a clay tool, but it works very well for this step. Usually they come with two ends, so you can flip it around for thick or thin lines.
You don’t need to indent every white line that you see, but a few here and there, especially in the high-contrast areas of the fur, will add realism and interest to your drawing.
Make sure the indented lines are pressed in heavily enough that they can’t be filled in with tone, but be careful not to tear the paper.
Class 3
Next, add an initial pass of tone to the entire dog.
Do this by holding a soft graphite or charcoal pencil on the side, so you can access the entire tip and make even, sweeping strokes.
Work in one direction, overlapping the strokes slightly to eliminate as much visible line work as possible.
Avoid the eyes.
Class 4
When the entire dog is covered with tone, blend the base tone smooth using a chamois cloth wrapped around your finger.
Use circle strokes, and press firmly, working to eliminate all lines and just leave a smooth, even layer of tone to work on.
This layer will be light enough to erase out bright highlights, and is a good start on filling the tooth of the paper for smoother passes of dark tone.
Class 5
Now you can start adding detail to the face.
Use a soft (4B to 6B) pencil to add darker strokes of fur in the mask on the face, always following the direction of the fur growth.
Pay close attention to the reference photo as you work, so that you don’t accidentally add tone over areas that are supposed to be kept white. Darken the nose and eyes, and add a bit of tone to indicate the mouth.
The eyes are very dark, but even so, keep the tone light enough that there’s contrast between the pupil and the rest of the eye, or the dog won’t look cute and friendly. Keep a white highlight in each eye as well. Blend the small areas with a stomp or tortillon, and blend the fur in the face with a larger blender, still working in the direction of the hair growth.
Class 6
Now add the darker fur.
This is the same process as adding the fur in the face, but you make the lines darker by switching to a softer charcoal or graphite pencil, or by pressing a bit harder.
At first, you can just rough the tones in place using a scrubby back and forth motion (not scribbling). Blend those out with a blending tool, then use a sharp, harder pencil to add individual hairs both in the body of the fur, as well as fly- away hairs all around the outside. This will take a while, so be patient and take breaks frequently.
Class 7
It is important to keep your pencil sharp during this whole process as well, or the hairs will appear to be different thicknesses.
The easiest way to do this is to keep a piece of sandpaper close to sharpen the pencil tip with.
Simply hold the pencil on the side and drag it across the sandpaper, rolling it as you drag to sharpen the tip evenly. This will also extend the life of your pencil because it doesn’t use up the wood so quickly.
Class 8
Work alternately with the pencil, the blending tool, and your kneaded eraser to add realism to the dog by adding details to the pads of the paws, pulling out highlights in the nose, eyelids, and inside of the ear, and adding additional darks to the claws, mouth, and features of the face.
It’s a continual back and forth process, and as you work, make a habit of stepping away from the work so you can come back and evaluate it with fresh eyes.
This will help you catch mistakes before they become too pronounced, and to know when the drawing is finished.
Class 9
If you want to add the ledge that the dog is leaning his paws on, use a ruler to draw the line of the upper edge.
Then, protect the edge with masking tape that has been stuck to your clothes a few times to make it less sticky. Tamp it down firmly, then add tone with a soft pencil to darken the upper edge of the ledge.
Blend the tone down with a stomp or tortillon, then make a second line with the ruler.
Protect that line with masking tape, and blend an even darker tone to show the front of the ledge.
Remove the tape to finish.
Reference Material …
Click here to download reference image
Click here to download step by step instruction handout
To save these to your computer simply right click on the link above and choose
the option to “Save As”. Save the file to your desktop for easy access.
 If you wish to download the files to your desktop, simply right click the link below and select ‘save as’
Then select the location you wish to save the files to (either your DESKTOP or MY DOCUMENTS e.t.c.)
Once finished, simply unzip the files (PC use winzip, MAC use stuffit) and your files will be there.
All written material can be opened as a PDF.
All videos files can be opened with VLC Media Player.
Select your download option below …