
 Login
LoginHow To Paint A Cat Using Watercolor With These Easy To Follow Steps
Course Overview & Basics
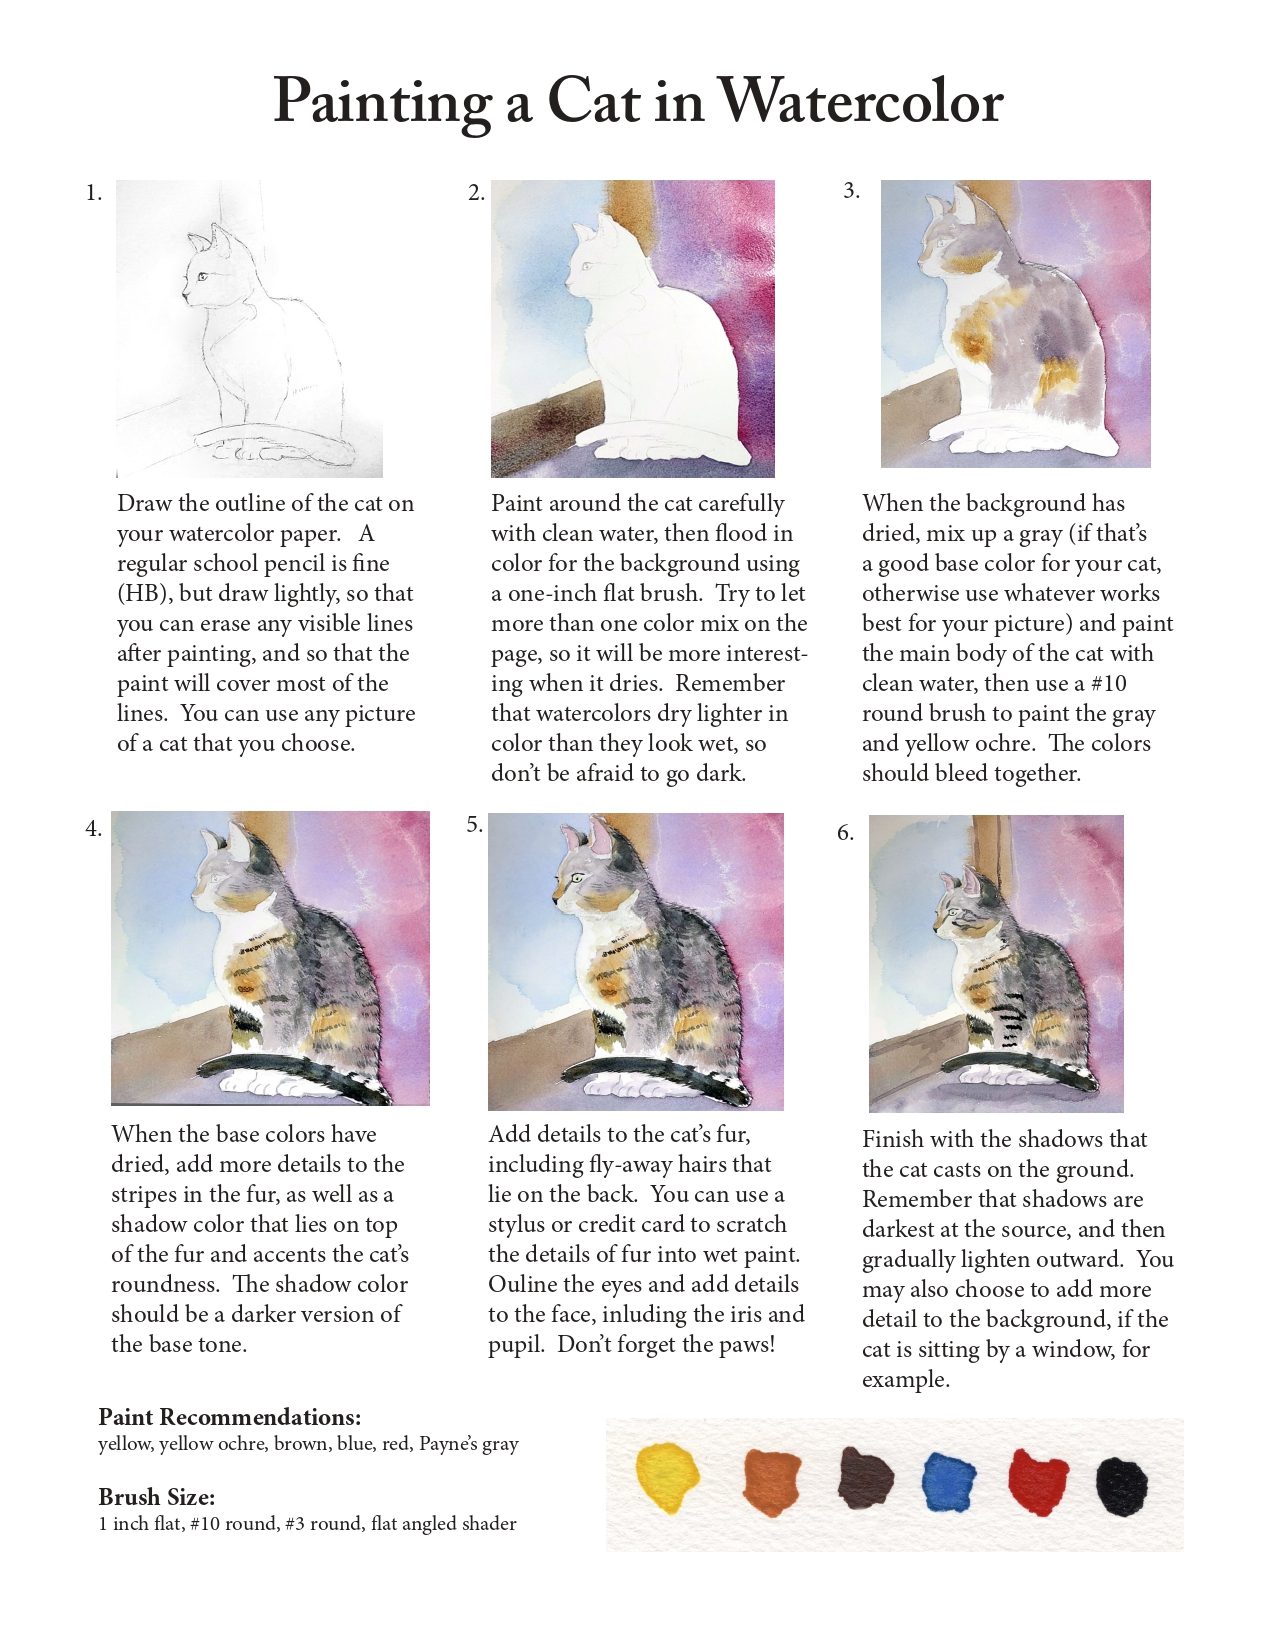
Begin by preparing your watercolor paper. You should only paint on rag paper, not wood pulp-based paper.
If your paper is an individual sheet, cut it to the size you want, soak it for 10 minutes or so in cold water, then fasten it to a firm backing such as plywood or gator board and let it dry.
If you’re working on a watercolor block, the paper is already fastened on all sides, so you can begin drawing your cat right away.
Class 1
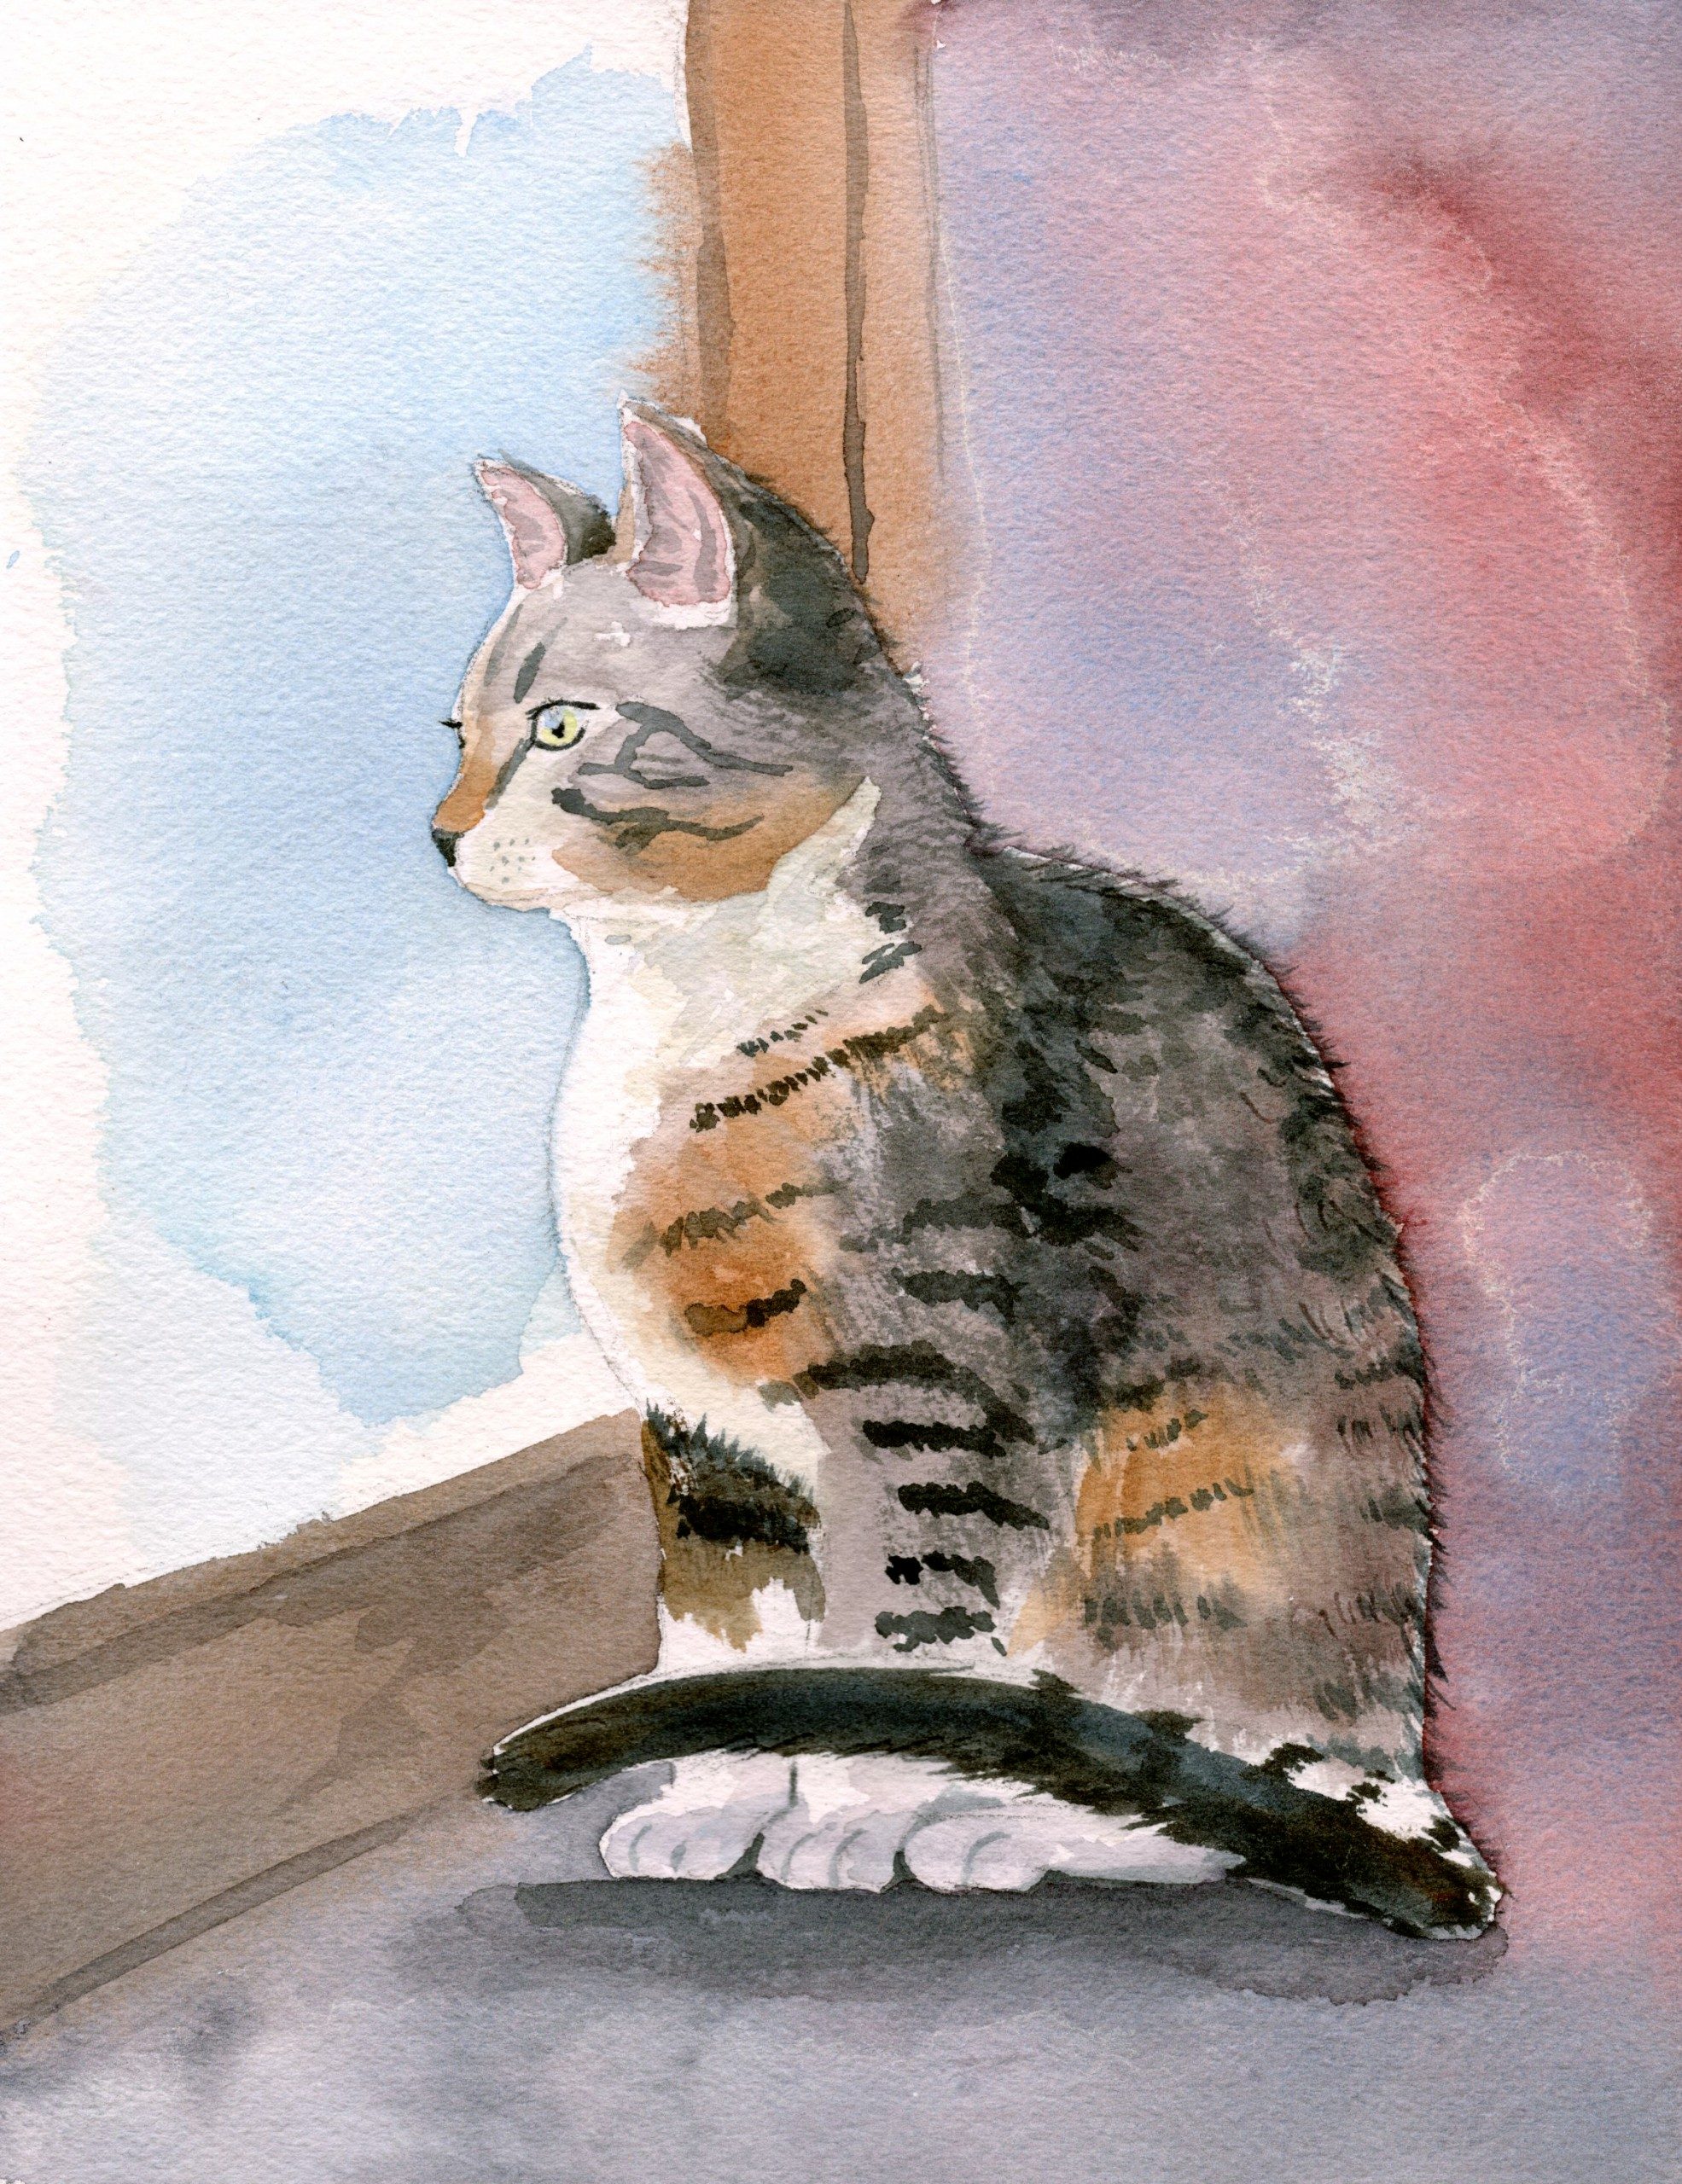
Draw the outline of the cat from a personal photo or the reference material for this course on your watercolor paper. An HB school pencil is fine, but don’t press too hard, or your lines will be impossible to erase.
Work until you’re satisfied with the drawing.
Class 2
Wet the entire background with clean water using a large, flat brush (1 inch is fine).
Flood in color for the back wall, letting more than one color mix on the page to keep it interesting.Remember that watercolor dries one to two shades lighter than it looks when wet, so keep your colors dark enough that they don’t fade away.
Class 3
Add a basic window sill and some light blue to indicate that the cat is looking out a window.
Let the background dry.
Class 4
Mix a gray base tone for the cat, testing it on small pieces of scrap watercolor paper before you paint it.
Paint the base tone gray, then add some yellow ochre patches to get the tortoiseshell look of the fur.
Let the base tone dry.
Class 5
Next, mix up a darker version of the base tone gray to use as a shadow color.
Test it with swatches before painting it on the cat, then use a large flat brush to add the shadows on the fur.
Try to see the shadow shapes as one big piece, and paint it as such.Large, connected shapes are more realistic and visually pleasing than disconnected ones.
Class 6
Paint the tail with a color even darker than the shadows.
As always, test your color before committing it to the painting, then paint it in the direction of fur growth.
To make the small flyaway hairs on the outside of the tail, first use a medium round brush, then while the color is still wet, pull small lines through the wet paint with a stylus or brush handle.
Class 7
Add stripes to the fur with a small round brush using a darker version of the gray base color.
Add additional hairs to the outside of the cat’s fur using the same technique that you used in the tail; while the paint is still wet, drag through with the small brush or stylus to create small flyaway hairs that stand off the fur.
Class 8
Add pink to the inside of the ears, then add more detail to the face by outlining the eyes and adding tone to the nose.
Using a small round brush, add small dots on the face where the whiskers grow, dark pupils to the eyes, and eyelashes.
You can also add detail to the feet by adding small lines between the paws.
Class 9
Now you can go back into the background and add additional details to the windowsill by giving some loose lines that indicate shadow and woodgrain.
End by mixing a purple-grey shadow color that you can paint both over the paws to be a shadow cast by the tail, as well as under the cat itself to give the sense of ground.
Class 10
If you want to try adding a few whiskers, make sure to practice with a thin brush on scrap paper first.
A rigger or fine line round will be necessary for this step.
Paint each whisker with one, fluid motion working in the direction of hair growth.
Reference Material …
Click here to download reference image
Click here to download step by step instruction handout
To save these to your computer simply right click on the link above and choose
the option to “Save As”. Save the file to your desktop for easy access.
 If you wish to download the files to your desktop, simply right click the link below and select ‘save as’
Then select the location you wish to save the files to (either your DESKTOP or MY DOCUMENTS e.t.c.)
Once finished, simply unzip the files (PC use winzip, MAC use stuffit) and your files will be there.
All written material can be opened as a PDF.
All videos files can be opened with VLC Media Player.
Select your download option below …