Today we’ll show you how to draw teeth.
Many of the same principles applied to drawing lips will apply when drawing teeth, because of course the lips are still visible, though parted.
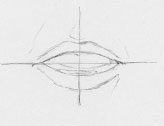
Begin by drawing the basic shape of the two lips and a guidelines that indicate the center of the mouth vertically, horizontally, and the plane that the teeth are on.
These lines will help ensure that the mouth doesn’t slope crookedly. Use light, sketchy strokes; it is very easy to overdraw lines, especially when drawing the mouth and teeth.
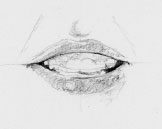
Erase guidelines and begin to shade in the areas of greatest contrast. These will be the corners and inside of the mouth, the bottom of top lip and top of bottom lip, and the bottom of the bottom lip.
The top lip is slightly darker than the bottom lip, and there is usually a highlight that extends across the middle of the bottom lip. Instead of drawing the teeth, define them by shading the areas around them.
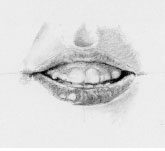
Add details such as the lines on the bottom lip that indicate where the skin puckers, and lightly (with a hard pencil, 3H or greater) add a few lines that show division between the teeth. Blend the darks to soften the lips, and add back in more darks if needed.
Remember that the teeth follow the curve of the mouth, and so the back teeth will be in shadow. There will also be a shadow over the top quarter or so of the teeth (or gums, if they’re visible) cast by the upper lip.
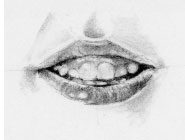
Pull out highlights on the front upper teeth and define the line of the lips by pulling out a line of highlight across the top lip and in places on the bottom lip.
Add finishing touches by blending, darkening, and lightening as needed.
Want To Learn More …
Drawing Made Easy is a simple course which shows you step-by-step how to draw people, hands, eyes, faces and a whole lot more from beginning to end, and a goldmine of sample illustrations for further ideas.
With clear (and fun) instructions on how to draw … you’ll learn at your own pace in the comfort of your home.


