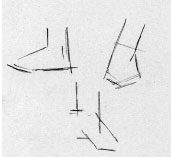
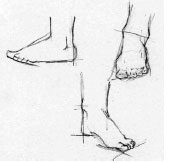
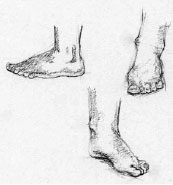
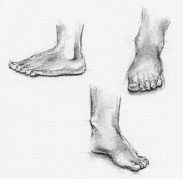
Today we’ll show you how to draw feet.
Feet are a complex system of tiny bones, muscles, and tendons, and so present a special challenge in drawing.
In proportion to other features of the body, the foot is roughly a third longer than the hand, and without a big toe would be about the length of the head.
To accurately draw the foot requires close observation of what parts are visible at a particular angle.
Guidelines are extremely important to help layout the plains and angles, so begin your drawing with the simplest shape and angle lines.
Begin to roughly define toes and ankle bone, remembering that the big toe is generally flat on the ground while the other toes bend over to reach the ground.
If you are drawing the foot at a foreshortened view from the front, the heel will end higher than the ball of the foot.
Erase the guidelines and make a final, simplified drawing without sketchy lines.
Do not outline the foot, but instead keep your line broken into alternating areas of thick and thin. Begin to indicate areas of shadow by shading.
Areas beneath the heel and toes will be dark, and there will often be a shadow cast by the ankle.
Blend the tones and pick out highlights on the ankle bone and toenails. If the tendons on the top of the foot are visible, indicate them by pulling out lines with the kneaded eraser and lightly darkening one side with a hard pencil (2H or more).
Creases on the side of the foot can also be picked out with a kneaded or electric eraser, and then accented in places with dark lines made with a sharp pencil.
Toenails are best kept fairly vague; use a partial line or two to hint at toenails, but do not overdevelop them or the foot will look artificial.
Want To Learn More …
Drawing Made Easy is a simple course which shows you step-by-step how to draw people, hands, eyes, faces and a whole lot more from beginning to end, and a goldmine of sample illustrations for further ideas.
With clear (and fun) instructions on how to draw … you’ll learn at your own pace in the comfort of your home.


