Water Color Mastery
Tutorial 1
Supplies and Basic Techniques
To begin in watercolor painting, you will need watercolor brushes, watercolor paint, watercolor paint, and water.
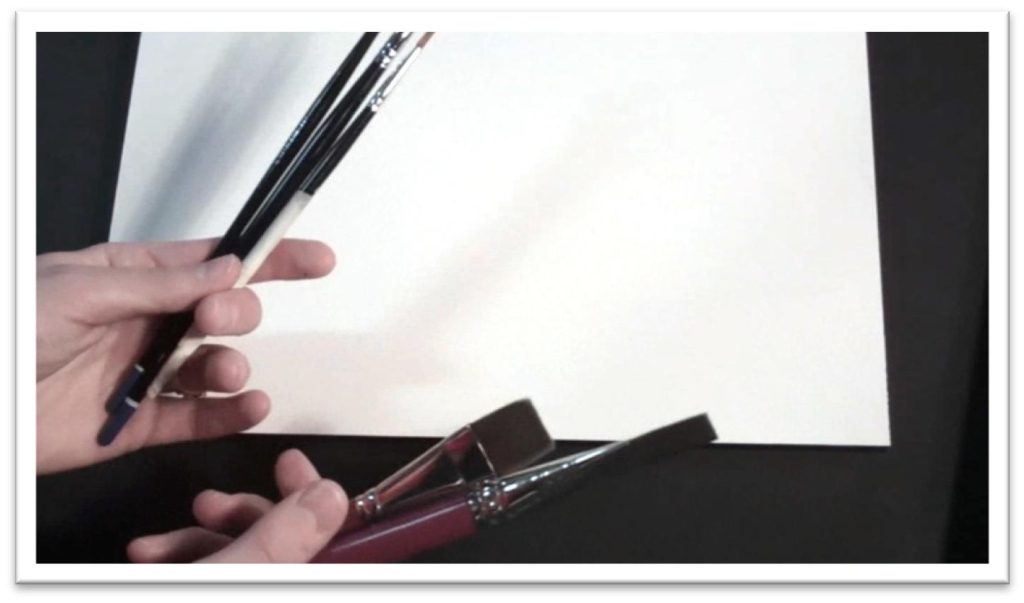
Choose brushes especially designed for watercolor painting, because they have bristles that are made to absorb water and release it evenly.
There are synthetic and natural bristles and good brushes are available in either category.
Choose brushes that hold a point well and have good spring.
Select a range of two or three flat and two or three round brushes to begin with.
• For flats, I recommend a ½ inch, 1 inch, and one either larger or smaller.
• For rounds, choose a small brush (0 to 2 range), medium (3-5) and large (6-8).
Watercolor paper is available as cotton or wood fiber; cotton paper has to be shrunk and is more durable.
Wood fiber paper is much cheaper, but not sufficient for professional work. Use cheaper paper to learn techniques with, but upgrade to a cotton rag paper for finished work as soon as you’re comfortable.
Cotton rag paper is available in three surfaces; hot pressed is smooth, cold pressed is medium coarseness, and rough is very coarse. I use cold press 140 lb. Natural white paper, but experiment with what works for you.
To stretch paper, soak the paper cut to the size that you want to work on in a tub or pan of water to fully saturate it for ten to fifteen minutes.
Hold it up by the corners to drain until the water stops dripping, then lay it on a flat piece of plywood or gator board.
Stable to the board with a staple gun (or use heavy binder clips if using gator board), or use gummed tape to fasten the paper to the board.
Staples should be no more than 3 inches apart. Let the paper dry completely. It will stretch as it dries and provide a smooth surface less inclined to buckling than non-stretched paper.
To take it off the board, remove the staples carefully with pliers or loosen them with a flat screwdriver and then pull them out.
When choosing colors, start with two or three yellows, reds, blues, and browns.
There is a huge selection. My personal preference includes payne’s gray, burnt umber, raw sienna, alizarin crimson, sap green, winsor red, cereleun blue, cobalt blue, winsor yellow, aurelion yellow, violet lake and ultramarine blue, but I also use many others.
There is no right or wrong, but white added to any color will make it opaque and result in a different style of watercolor painting, called “opaque watercolor painting,” whereas these tutorials will be focused on transparent watercolor painting.
To create different surfaces and textures in watercolor, experiment with wet-on-wet and dry brush techniques. In wet on wet, both the paper and the brush are wet, providing free flowing color that bleeds out at the edges.
Painting with wet brushes on dry paper will provide a hard, clean edge quality, and using a dry brush on dry paper will result in an uneven texture that can be very useful for describing non-smooth surfaces.
Wet-on-wet technique can be used to layer one color or more over another, and letting the colors mix on the page. This is called “granulation.”
Dripping water over wet paint will result in a bloom. If you brush over the bloom, the tone will still remain uneven because the water droplet will have picked up the color.
Sprinkling water by spraying with a spray bottle will result in an interesting variety of effects depending on how wet the paint is and how much water you spray. Try a selection of spray and squirt bottles to find different effects.
Lift water by using a wet brush dragged over the surface, or by blotting the paint with a tissue, sponge, or a “scrubber,” a brush designed for scrubbing out paint.
Results will vary depending on how wet the paint is when you try to lift it. The longer paint has been on the paper, the harder it is to lift.
Scrape lines into the surface using a palette knife, credit card, needle, or many other implements that can scratch without damaging the paper.
If the paper is wet when you scratch, a dark line will result. If fairly dry (but not completely), you’ll get a highlight.
Practice different techniques on cheap paper until you’re comfortable with the medium, and remember that watercolor will dry two to three shades lighter than it looks when you paint, so don’t be afraid to use plenty of paint.
Tutorial 2
Preparing the Surface, Choosing References, Transferring Drawings
If you’re working on stretched paper, make sure that the paper is completely dry before you sketch on it, otherwise the pencil will bite into the surface deeply and be impossible to remove.
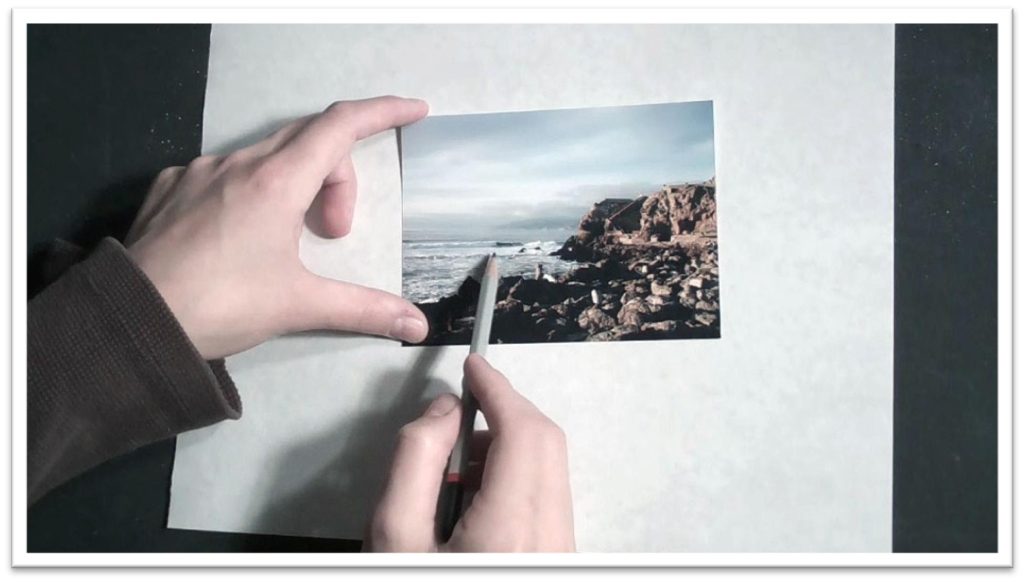
If working from life, arrange the subject matter in an eye-pleasing composition and sketch it under different lighting and from different angles to get a feel of the directions you could take in the painting.
If you’re using photos as references, choose one or more with good color and adequate line quality, so that you’re provided with enough information to finish the painting.
Consider the color scheme that you want to use and experiment with cropping the picture to emphasize different elements.
Feel free to combine references, to use them only as aids to your imagination, or to leave out any part that you don’t care to use. Be careful that you’re not copying pictures that you don’t have permission to use, however.
It’s a good idea to use masking tape to preserve boarders around the edges of the watercolor paper, especially if you have a habit of not leaving enough margin to mat your work.
Use 1 ½ to 2 inch masking tape and tape over the staples (if using stretched paper) so that you have an even boarder on all four sides of the paper.
When you’ve settled on the material to paint, you can draw it directly on the paper, draw on different paper and transfer the drawing to the watercolor surface, or trace the image and transfer to the watercolor surface.
Sketching directly on the paper is of course faster, but if you have to do a lot of erasing you can wear down the tooth or even remove layers of paper, which is highly undesirable.
So if you do choose to work directly on the paper, use a 2H pencil and work lightly, avoiding erasing whenever possible, but using a very light touch if you do need to erase.
If you work on a separate piece of paper, you may need to transfer the drawing to the watercolor surface.
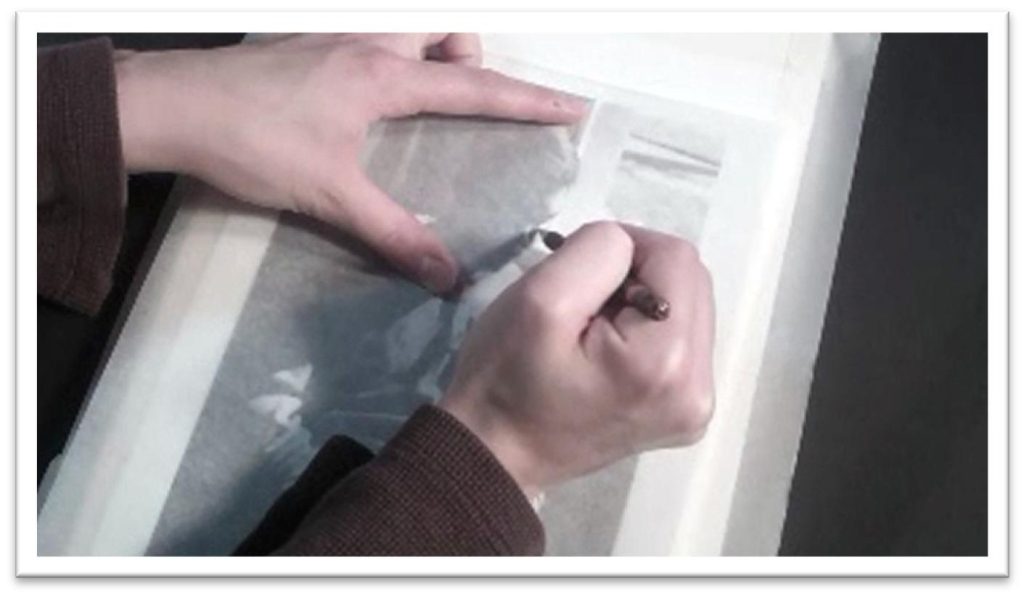
This is easily done with a piece of tracing paper and some graphite transfer paper. Trace the image onto the tracing paper with a dark pencil, making sure to include all of the major lines and shapes that you want to preserve.
Next, lay the transfer paper graphite side down on the watercolor paper, with the tracing paper on top. Use a sharp, hard pencil such as a 4H to trace the drawing.
Check to make sure that it’s going through to the watercolor paper by carefully lifting the transfer and tracing paper to see, then finish working.
When the drawing is on the watercolor paper, consider whether there are any small, important highlights that you want to preserve and paint them on with masking fluid.
You can use a masking pen if you like, or, more cheaply, you can purchase as small pot of masking fluid and apply it with cheap, disposable brushes (wash immediately after each use to help keep the masking fluid from building up in the bristles), or other tools.
Depending on the size of the area to be masked, I use a brush handle, needle tool (generally used for pottery), palate knife, or even my finger.
Don’t bother masking very large areas, as there are different ways of masking them which are much faster and more effective.
Tutorial 3
Seeing Form as Shadow Patterns
Your first step as a painter is to simplify forms into interesting shapes that give adequate information without overburdening the eye with too many details.
Detail is important, but paint every hair, every eyelash, every nuance that you see, and your painting will look amateurish and overdone.
To draw back from that tendency, practice painting forms as a contrast of two distinct tones, the mid-tone and the shadow.
Begin by drawing the outline of a form on your paper. It’s best to use a picture or object with distinct shadow, so play around with your lighting until you get the desired effect.
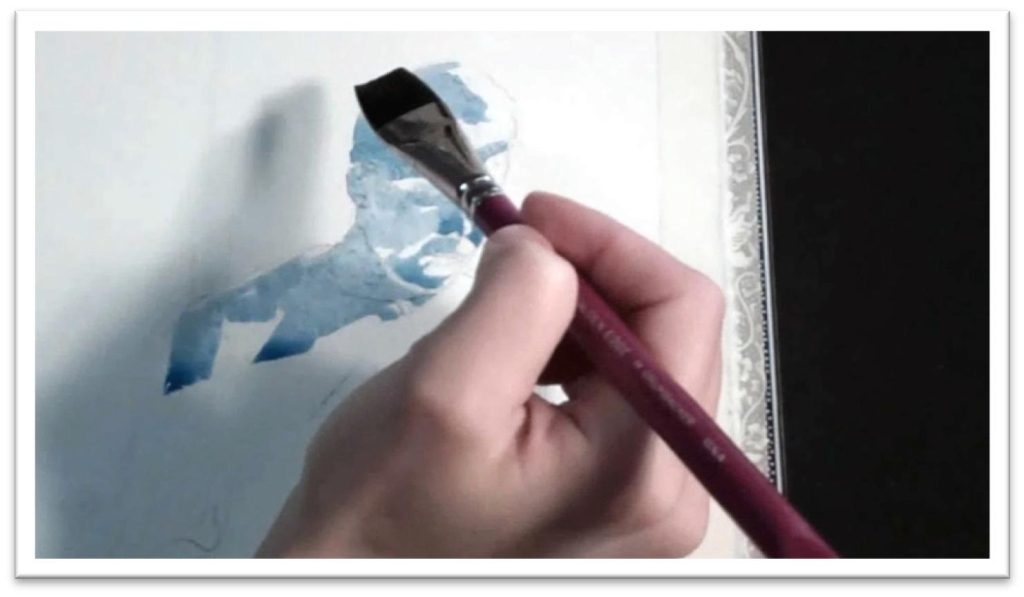
Mix up enough of the mid-tone color to fill the form completely, then paint it quickly, using as large a flat brush as you can.
Be careful not to let some parts dry before the whole surface is covered, or your tone will be broken at the dry lines that have been gone over again.
When the whole form is painted in the mid-tone, let it dry completely. If you want to, you may draw the shape of the shadow on your paper to serve as a map for your brush.
Mix up a stronger, darker version of the mid-tone to serve as the shadow color, and paint the shape of the shadow playing over the form.
The shape should be interesting and bold, without too many finicky details to distract the eye. When it comes to details, less is more. Always try to link the smaller shapes together to form larger ones.
As in the mid-tone color, you should paint the shadow with as large a brush as possible. Flat brushes are better for this work, as they can be held on edge for smaller areas and still create large areas of even color when needed.
Round brushes are not suitable for washes, and tend to create a “picked at” look in this exercise.
Squinting at your reference may help you to see the shadow pattern more clearly. Translate to your painting only what is essential to describing the form.
It is more difficult than it seems, which is why it is best to begin with two tones of the same color.
When the shadow coat is semi to mostly dry, you can blend some of the lines or soften with a shading brush, tissue, or wet flat brush.
Variation in the line quality will add interest to the painting, so make sure to keep some hard edges as you work.
This exercise is as essential to learning painting as playing scales is to learning music, so practice as often as you can.
Paint everyday objects, and practice seeing everything that you encounter as patterns of shadow and highlight. Use this exercise as a means to change the way you see the world.
If you’re working on stretched paper, make sure that the paper is completely dry before you sketch on it, otherwise the pencil will bite into the surface deeply and be impossible to remove.
If working from life, arrange the subject matter in an eye-pleasing composition and sketch it under different lighting and from different angles to get a feel of the directions you could take in the painting.
If you’re using photos as references, choose one or more with good color and adequate line quality, so that you’re provided with enough information to finish the painting.
Consider the color scheme that you want to use and experiment with cropping the picture to emphasize different elements.
Feel free to combine references, to use them only as aids to your imagination, or to leave out any part that you don’t care to use. Be careful that you’re not copying pictures that you don’t have permission to use, however.
It’s a good idea to use masking tape to preserve boarders around the edges of the watercolor paper, especially if you have a habit of not leaving enough margin to mat your work.
Use 1 ½ to 2 inch masking tape and tape over the staples (if using stretched paper) so that you have an even boarder on all four sides of the paper.
When you’ve settled on the material to paint, you can either draw it directly on the paper, draw on different paper and transfer the drawing to the watercolor surface, or trace the image and transfer to the watercolor surface.
Sketching directly on the paper is of course faster, but if you have to do a lot of erasing you can wear down the tooth or even remove layers of paper, which is highly undesirable.
So if you do choose to work directly on the paper, use a 2H pencil and work lightly, avoiding erasing whenever possible, but using a very light touch if you do need to erase.
If you work on a separate piece of paper, you may need to transfer the drawing to the watercolor surface. This is easily done with a piece of tracing paper and some graphite transfer paper.
Trace the image onto the tracing paper with a dark pencil, making sure to include all of the major lines and shapes that you want to preserve.
Next, lay the transfer paper graphite side down on the watercolor paper, with the tracing paper on top.
Use a sharp, hard pencil such as a 4H to trace the drawing. Check to make sure that it’s going through to the watercolor paper by carefully lifting the transfer and tracing paper to see, then finish working.
When the drawing is on the watercolor paper, consider whether there are any small, important highlights that you want to preserve and paint them on with masking fluid.
You can use a masking pen if you like, or, more cheaply, you can purchase as small pot of masking fluid and apply it with cheap, disposable brushes (wash immediately after each use to help keep the masking fluid from building up in the bristles), or other tools.
Depending on the size of the area to be masked, I use a brush handle, needle tool (generally used for pottery), palate knife, or even my finger.
Don’t bother masking very large areas, as there are different ways of masking them which are much faster and more effective.
Tutorial 4
Granulation Techniques
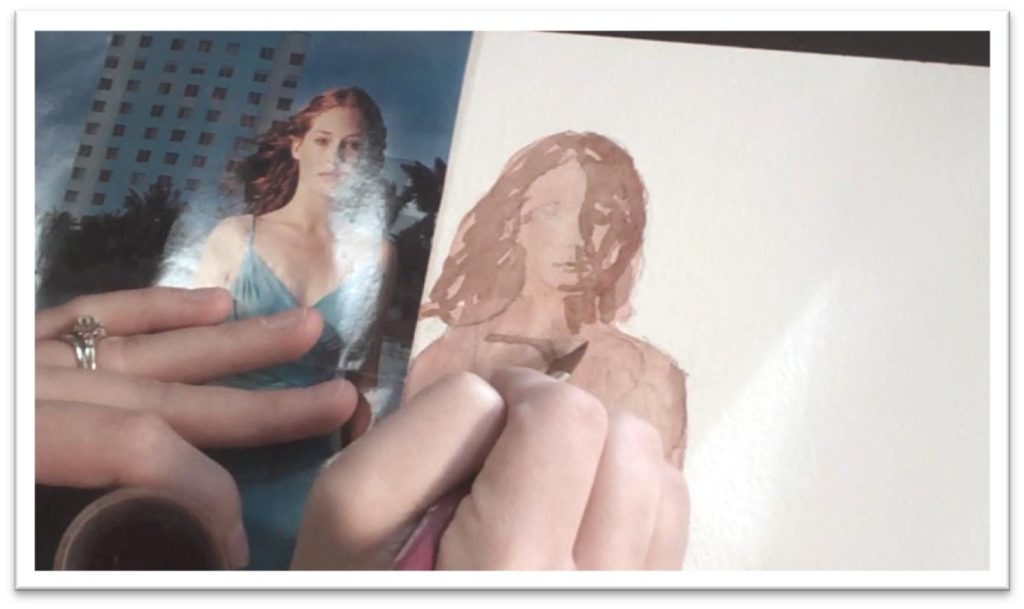
Flesh tones can either be mixed on the palette and then applied to paper, or mixed directly on the paper using the granulation technique.
When doing the latter it’s easy to make mud, or ugly patches of lifeless, dull color.
Because of that, take some time to develop some swatches that will give you direction before you begin a finished painting.
Use a large piece of scratch paper, layer one
wet wash of color over another, and write down the order and color that you use.
Try cerulean blue washed over with a purple, washed over with sap green, ultramarine blue, and then a mix of alizarin crimson and raw sienna.
The last color you paint will dominate, so keep that in mind as you work. Try many different combinations of colors, different intensities, and with different amounts of moisture. Every alteration will modify the outcome.
Granulation creates more vivid, exciting color than the flat tone of pre-mixed color because layering one color on top of another creates depth and visual interest.
Don’t be discouraged if your early attempts are less than gorgeous; just keep at it and try different colors.
When you have some swatches that give you a good idea of how to make an eye-pleasing flesh tone, move to the canvas where you plan to paint.
The references for this exercise should have bold, definite lights and darks. A black and white photo is a good idea, because you’re not interested in the color so much as the shadow pattern.
Draw the subject matter on your paper and preserve the small, delicate highlights with masking fluid if you desire. Also, sketch the pattern of shadow on the face to provide a roadmap for your painting before you begin.
This will help ensure that you don’t accidentally paint over areas that are supposed to be kept white.
Using the white of the paper as your highlight color, paint the midtone of the face in one clean, wet wash using as large a flat brush as you can to help keep the tone nice and even.
Begin with the first color that you used successfully in one of your swatches; cerelean blue, perhaps.
When the entire first layer is accurately painted, begin layering over it with more paint in the order of your swatch. Don’t try to cover every inch of the wash with your second color; be playful.
When you’re comfortable with the first step and have layered three to five different colors on the painting (typically), let it dry completely.
Once it’s dry, you may wish to go into some areas with darker paint to accent particular lines. Other lines may need to be softened or blended.
Remove the masking fluid once the paper is completely dry. Often, the masked lines need to be softened or they stand out from the rest of the painting as too stark.
To soften edges, use a damp angled shader brush or a damp round and gently go back and forth over the area.
You can then blot with a tissue to wick up excess moisture before it bleeds into the paint and creates a bloom, or you can leave it to bloom and make that texture pattern part of the finished work.
There isn’t a set of rules to follow, just do what you need to make a successful painting.
Tutorial 5
Painting the Upper Face
Use the principles of painting in layers of color and seeing shapes in tone differentiation whenever you paint anything, regardless of subject matter.
To begin painting a face, sketch a clear drawing on your watercolor paper that includes the eyebrows, eyes, nose, and cheeks.
For this exercise, don’t worry about face shape—keep it small and simple.
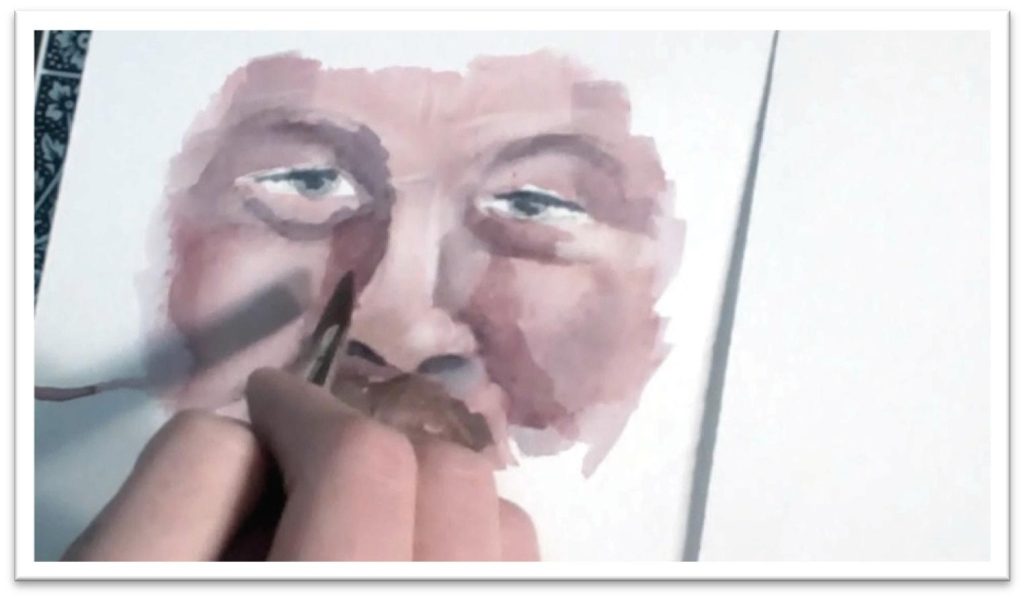
Wash over the flesh areas with a brush of clean water, painting around the eyes to help keep paint from tinting the whites in the early stages.
Try beginning with a local flesh color in this case (local refers to the color that it appears to be), and then, while the initial wash is still wet, add some yellows, browns, and blues as needed.
You’re still using the principles of granulation, but in a more controlled manner.
When the washes of color are fairly dry, drop in some shadow shapes. Shadows are not black, but are a darker tone of the color that they’re being cast over.
To give an accurate impression of shadow, use the compliment of the color that is being shaded. Because the paper is still in a semi-wet state, the shapes should bleed slightly at the edges.
While the paper is at this level of dryness you can also use an angled shader or flat brush to begin developing the highlight areas. Just stroke over the paint and the white paper will show beneath.
Let the paper dry completely. You may want to use a hair dryer to speed up the process.
Next, mix up enough of the shadow color to cover everything you need (a small mixing cup is good for this.
Mixing cups are available at art stores, but are nothing more than a small plastic container), and use a flat brush to lay in the more definite, clean-edged shadow shape.
It should extend in one fluid wash from eyes, down the nose, and under the nostril. Make the shape clean and bold so it comes across as intentional rather than fussed over. It will look strange at this point. That’s alright.
As the shadow shape dries, you can begin adding color to the iris of the eye. If the iris is too small for you to use a flat brush, use a round, but paint in smooth, back and forth strokes to make the wash as even as possible.
Avoid the highlight in the eye if one is visible; it’s much easier than trying to pick a clean white out later.
When the shadow shape is mostly dry, use a damp flat brush to gently blend the edges. As you work, using small circles, you will be softening the edges of the darks and creating the highlights at the same time.
The color probably faded in drying and will need to be touched up, so while the paper is wet from making highlights, drop in some more intense color into the cheeks, nose, and under eye area as needed.
The color should blend itself into the wet areas without covering them completely. Do the same thing with the darks, and when the paper is dry to the touch but still cool, pull out precise lines and highlights.
If there are wrinkles, use a damp angled shader (mine is a cheap craft brush) to pull out white lines that will read as highlights.
Finally, drop in some fine lines to read as eyebrows and eyelashes when the paper is dry enough to hold detail without bleeding.
Remember; paint in a wash of the shape first, then pull out just enough tiny hairs to make the shape read as eyelashes or eyebrows. As always, less is more.
Tutorial 6
It doesn’t matter what tone of skin you paint, the system differs only in which colors you choose to layer on top of one another.
However, it’s important to find a base color that is predominant in the flesh and use it as your ground to keep to a consistent color family.
For example, the skin may have a bluish tint, or reddish, or yellowish.
If you start painting skin with a bluish tint, mix the reds into that blue so they become bluish reds.
The browns will be blue browns, the yellows will be bluish yellows. In that way, the color will have liveliness and visual interest, but will also maintain consistency.
Begin with one part of the face to simplify the exercise for yourself, for example, you may choose to paint only the upper or lower part of the face. Don’t worry about face shape.
When the partial face is sketched on your paper, wash over the flesh with a flat brush loaded with water or a light base color for the skin. Avoid the whites of the eyes.
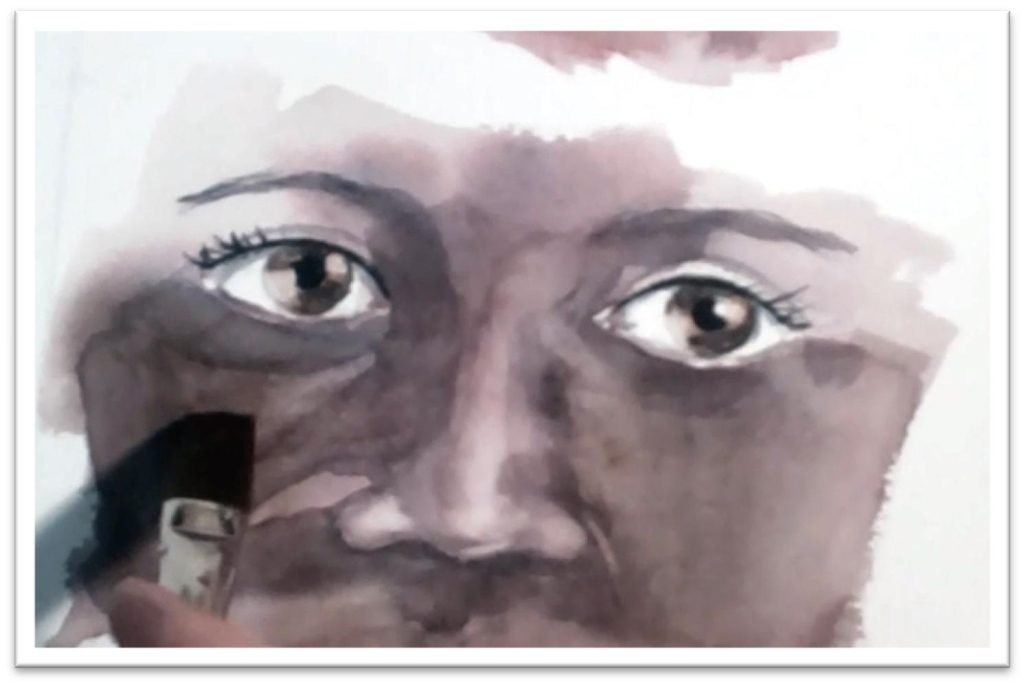
While that wash is still wet, flood into it with colors in your chosen color family. All flesh has quite a bit of red in it, but darker flesh is also filled with purples and blues.
Avoid using a pre-mixed brown; the colors mix together to make a brown that is more energetic than a flat, solid tube color.
When laying down your initial wash, try to preserve highlights and darks somewhat to make your portrait more accurate from the beginning.
When this wash is completely dry, mix up a shadow color and paint it over the top as one big shape using a flat brush to help keep the strokes as even as you can.
While the shadow shape is drying, lay in some color in the irises. Paint around the pupil and leave a white highlight, then blot out another highlight in the corner of the iris using a paper towel wrapped around your fingertip.
This is an easy way to make highlights if done when the paper is at the right wetness, because it lifts out clean color but the paint still tends to seep back slightly, making a soft, blended look all on its own.
Spark more life in the eyes by adding details; color variance in the iris, the small patch of red that is visible in the inside corner, and the light blue shadow that is cast on the eyeball by the upper lid.
The pupil should be as dark as you can make it, and you can also use that color to accent the nostrils, which are also very dark.
Develop the eyelid with a thin round brush, but consider even this “line” to be a shape, complete with the eyelashes.
The eyebrows are another shape that can be broken up with a line here and there to subtly indicate hairs without overdoing it.
Don’t be tempted to add detail where you shouldn’t be able to see any, however, or you’ll disrupt your realistic illusion.
For example, a person meant to be standing in the distance will not come through in perfect focus, nor should you be able to see his or her individual hairs.
Detail should not be visible in places of extreme light or dark for the same reason.
Always keep this in mind in painting, and remember that the longer you look at something, the more detail you tend to see. That doesn’t mean you should paint it all.
Finish the painting by blending the stark shapes here and there with a damp flat brush.
Don’t over-blend or all your edges will look the same and your picture will be dull. Keep some areas of high contrast with crisp, sharp lines and soften others.
Tutorial 7
Painting Lips and Chins
To illustrate how similar the procedure for painting even very different lips and chins, the video tutorial covers both a young woman and an old man.
Draw the features clearly on your paper or board, dark enough that the lines will show through under very wet washes of color.
Paint clean water over the skin tone, avoiding the mouth for the time being, but paint right down the neck.
Flood the wet paper with a local skin tone, adding more color as needed in the protuberant areas like the chin, cheekbones, and nose. When the paper is slightly dry but still wet enough to bleed, drop in some darks in the areas that have shadow. Let the paper dry completely.
Next, mix up a small cup of the paint you’ll use for the shadow tone, and paint the shadow in one big piece.
You can add color to the shadow when it’s still wet to indicate that there is flesh tone beneath the darkness.
Begin blending the tones together with a brush that is wetted and then squeezed between your fingers, making it damp.
A wet brush on wet paint will create a bloom. Brush the damp brush over some of the dark lines, letting them bleed out into the surrounding flesh tone and be blended.
While the shadows are drying, you can begin on the lip color. The upper lip is darker than the lower, and darkens further at the edges where it pushes back against the round head.
Use a light, local lip color to lay in a pattern that avoids the highlights, then drop in some other colors to create visual interest and depth.
When the first layer of colors dry, add some darks in the corners, let those dry, and then lift out highlights or scratch in lines with the edge of a palette knife, a paintbrush handle, or even a fingernail. Scratching works best when the paint is slightly wet.
Don’t think that you have to be satisfied with the flesh tone just because you’ve dropped in shadow tone; you can wash back over the flesh with a different color after everything is dry and tint it to be more red, or whatever you think it needs.
Doing another wash over everything at the end is a good idea, because it will help tie the shadows and mid-tones together. Be aware, however, that if the bottom layers are not completely dry, the wet wash will blur and mix them, and you could wind up losing detail.
When the shadows are dry, you can further develop details in the rest of the face as well. If the person has wrinkles, lay in the darks with the side of your flat brush, then pick out a highlight on one side or other with a damp flat brush.
Wrinkles can be drawn in with a thin round brush or rigger—a thin brush with long bristles that was invented to paint the rigging on ships.
Even in the wrinkle lines, you can develop them in a single color, then touch the wet line of paint here and there with a different shade to break up the monotony.
If you’re painting a man with sparse facial hair, lay in a few hair lines after everything else is done. You may choose to use a thick white paint for this step, or a watercolorist cover-up, which is a product tinted to match the typical watercolor papers.
Experiment with toothbrush splatter techniques or using a small brush to paint individual hairs, but don’t over-do, or the beard will be the first thing you see instead of a detail on a portrait.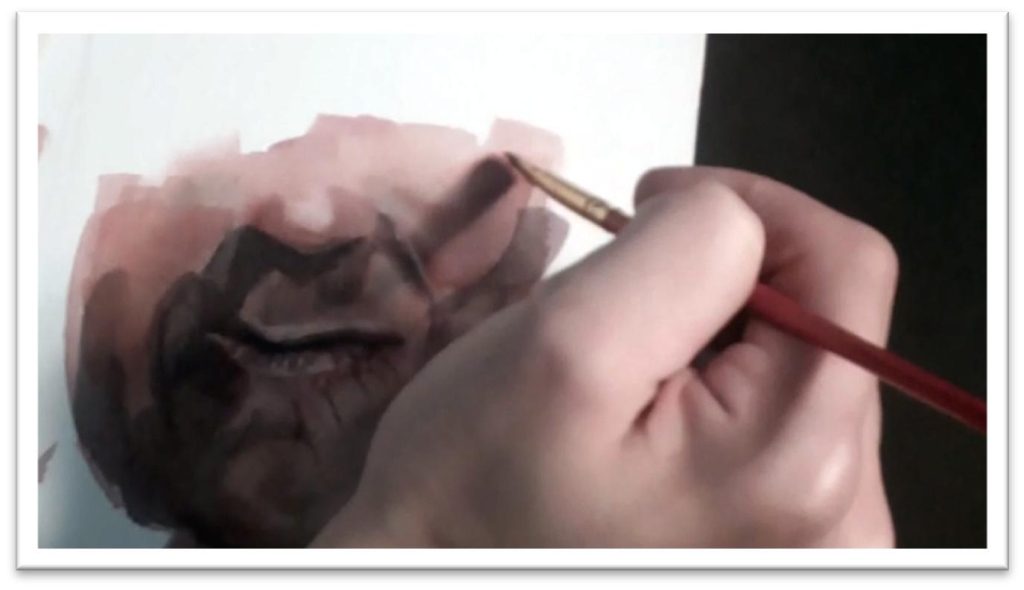
Tutorial 8
Painting Hair
The treatment of hair varies somewhat according to type, but remains consistent within two broad categories: soft hair and bristly hair.
So, for example, soft hair will be painted in wet washes regardless of whether it’s straight or curly or wavy, and bristly hair (such as facial hair) will be most successfully rendered with a dry brush technique.
Begin by drawing the shape of the hair on your
paper. If you’re painting a portrait, paint the hair after the skin tone, so that it will appear to be on top of the skin and not vice versa.
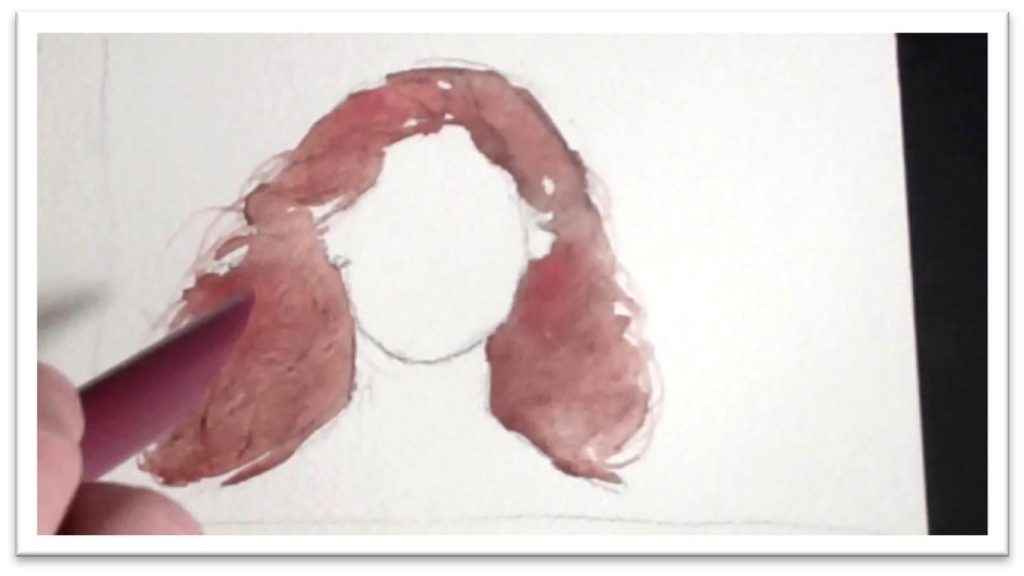
Wash over the shape with clean water or water tinted the local color, being sure to preserve highlights by avoiding them with water.
You can even use a small brush to make detail strands of hair; the color will follow the water path and in this way the hair will paint itself.
Flood in deeper color, touching the brush loaded with paint to spots all over the hair, ensuring good distribution.
While the color is still wet, drop in more colors to create visual interest and to keep the hair from laying flat.
You can add some darks at this time, knowing that they will bleed into the first color nicely, and you can touch the paper towel or tissue here and there to lift out large highlight areas.
This is also a good time to bring out more detail strands if you wish; simply drag a clean brush or brush handle through the wet paint to create individual hairs above the body of hair.
When the paint is mostly dry, scratch out details with the handle of your brush, needle tool, or palette knife.
Depending on how wet the paper is, these scratches will appear as either highlights or dark strands. You can flood more color over the top of dark scratches and still retain them.
If you’re painting curly or wavy hair, the detail work in conjunction with the over all shape of the hair will make it read as curls.
Remember to lift out some horizontal highlights with a flat brush to make it look as though the outermost part of the curls are catching light.
When the washes are dry, add further darks where needed. Beside the neck, on one side or other of the part line, and at the bottoms of curls are common places.
Try to envision what the hair is doing to help in painting the shadows accurately.
If painting bristly hair, use a stiff brush (such as a fan brush, a hog bristle brush, or a nylon bristle brush) to do a dry brush technique.
Dip the brush in the local color, dab off excess moisture on a tissue, and then use short, brushy strokes that follow the direction of the hair growth.
The texture should look like thick, bristly hairs—perfect for a short moustache or beard. Over the top of these strokes, you can wash more color or blend and soften areas.
You can use the dry brush technique with more than one color to get the same sort of bleeding that you do with wet on wet layering, or you can begin the technique with a wash of color, let dry completely, and then texture over the top with dry brush strokes.
Experiment on scratch paper to see what works best for the look you’re trying to get.
Tutorial 9
Finished Portrait of a Young Girl
Begin by drawing an accurate depiction of the person on your watercolor paper.
Wash over the flesh of the face and neck with clean water, avoiding areas that you don’t want to get paint on such as the whites of the eyes and teeth.
Immediately flood the area with local color, dropping in accent colors of reds and yellow as needed. Mix a little blue with the flesh color
(cerulean works well) and begin placing some shadow as well. Let that wash dry.
When the face tones are dry, lay a foundation for the hair by loading a large flat brush with the base color and painting the large shape of hair, leaving whites to serve as highlights.
Once again, don’t be shy about dropping in more colors; depending on the hair color, you may want some different yellows, reds, browns, or purples—experiment and have fun with it.
When the wash is mostly dry, you can scratch out some lines in the body of hair that will help show the direction of growth and accent individual strands.
Go back into the face with a shadow color and lay down the shadow as one big shape, connecting smaller shapes into larger whenever possible.
It should look clean and not picked at, so use the largest flat you can and work the paint quickly enough that it doesn’t dry in places that you need to build on.
When the shadow is mostly dry, you can feather the edges and blend them using a brush with clean water.
As that layer is drying, you can do more work in the hair. Don’t be afraid to make the space beside the shoulders very dark; you need the hair to look like it’s behind the face, not on the same plane as the nose.
Develop small flyaway hairs by drawing a palette knife or the edge of your watercolor brush through a patch of wet paint, or when you have to, by painting the hairs with a small brush or rigger.
Flyaway hairs should be lighter in color than the body of the hair. Don’t overdo them, or your portrait will look too hairy.
Paint the irises of the eyes after preserving the white highlight with a dot of miskit, if needed.
Remember that even in this small area there should be more than one color present, and that there is a lot of contrast in the eye.
Blot out light areas with a paper towel and drop in dark accents with a small brush. There is a dark line around the iris, and interesting lines and designs in the iris which you can duplicate by scratching out lines with a needle tool.
Make the pupil very dark, using payne’s gray or indigo. The line of eyelashes is also very dark, so put it in as a single thick line with plenty of paint, then scratch through the wet paint to draw out individual eyelash hairs.
Use a color closer to the flesh tone to define the lower lid, and keep the bottom eyelashes smaller and more delicate than the upper.
Remove the miskit from the eyes and reshape the highlight as needed. Use a watered down cerulean blue to create shadow in the eyeball itself, and go quite dark in the corners to push them back and make the eye appear rounded.
A highlight over the top of the eyeball will help make it look realistically wet.
The lips should be laid in with a solid red color that is broken up with interesting shapes and patterns to indicate the puckered surface.
The lower lip is lighter in color than the upper, and usually has a strong highlight across the fleshiest part. Make the corners darker than the centers to make it look like the lips are curving with the face.
The small pucker lines can be scratched through wet paint with a needle tool or palette knife, or carefully painted in with a small brush as needed.
To soften edges or rub out final highlights, use a small angled brush dipped in clean water and go over the surface of dry paint using a light circular motion.
You can then blot the area with paper towel or tissue to lift out a clean white, or go without blotting to make a less vivid highlight.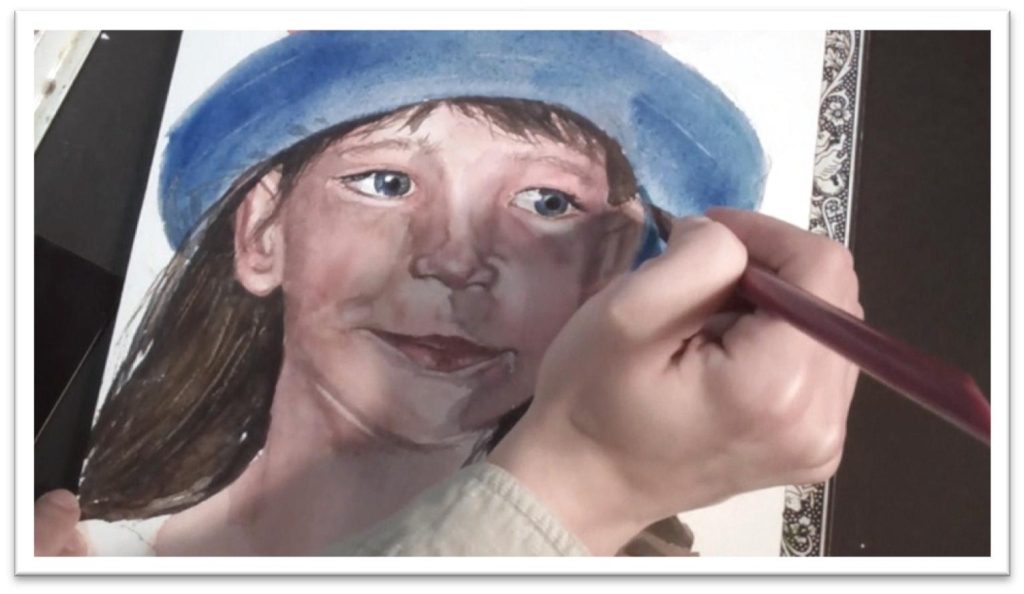
Tutorial 10
Finished Portrait of an Elderly Man
Begin with an accurate drawing of the man on your paper.
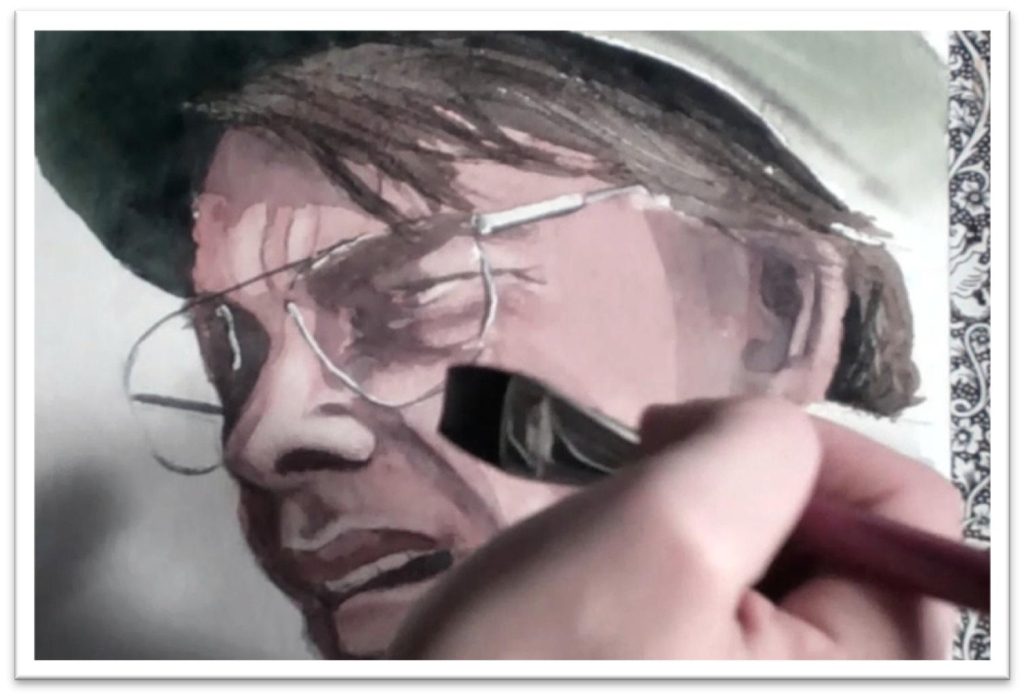
If he’s wearing glasses, you will want to save some of the highlights of the lenses and rims by carefully applying miskit.
Wait for the masking fluid to dry completely, then wash over the flesh tone with a local color.
You may choose to flood the area with water
first, or simply to begin with color and then bleed more colors on top of that initial coat.
The paper will dry faster if you don’t wash water in first, but the colors will be less fluid. When the colors are in place, lift out some highlight areas with a damp brush.
As you wait for the first layer of skin tones to dry, you can begin an initial coat of color in areas that don’t touch the skin; in the example, we lay in color for the hat and shirt.
When those colors have dried, paint in the hair. Use a large flat brush and work with confident, even strokes to get the color on the paper smoothly.
Don’t forget to preserve highlights as you work. Drop in some different colors for variation, and blend these together by running the blade edge of a palette knife or brush handle through the paint in the direction of hair growth.
If the paper is fairly dry, you will lift out white lines that will read as gray hair.
Lay in the shadow coat over the face. A good choice for shadow color is typically cerulean blue mixed into the flesh tone.
In older faces, you may see dominant lines and wrinkles; make sure that you lay in the shadow of these areas evenly and boldly, dropping in red flesh tones as needed to keep the shadows looking natural instead of like dark patches on the face.
Blend and soften the skin tones by washing over the dry paper with a damp flat brush.
If you find that the tones are too distinct, you may choose to wash in a tinted color that will lessen the contrast between dark and midtone, but don’t be afraid of darks—without them, your portrait will remain flat and dull.
When the paper is completely dry, you can work on the details. For fine lines and wrinkles, alternate between pulling out lines of white with a dampened angled shader brush and painting in the dark side of the wrinkles with a small round brush.
Add the dark areas of the nostrils, eyes, and mouth with very dark paint—Payne’s gray or indigo work well for this.
But even in these areas be sure to flood in some red to help tie the darks in to the surrounding flesh tones.
Remove the miskit by rubbing it off with your finger. The stark whites will need to be toned down in places by softening the edges with a damp brush or washing over them with a different color.
Use a small round and a dark color to outline the rims of the glasses here and there as well, though—don’t outline the whole form, but use broken lines to give the impression of glasses.
Go into more detail in the shirt and hat, picking up lines in the seam area and darkening triangular shapes to serve as wrinkles.
On one side or the other of these triangles, you’ll want to pull out a highlight to help the area read as folds in a shirt.
The darker the shadows, the deeper the fold will appear. In the hat, darken the area that is angling down to make it appear to be behind the face.
The area right above the hair will also be in shadow, as this part of the hat is farther in than the outer side of the brim.
Tutorial 11
Sketching a Floral Scene
This tutorial will cover the most effective methods for preserving bright, distinct, yet warring colors in a landscape.
How do you go about depicting bright greens and pinks, for instance, without having to paint each flower individually? It’s not as difficult as it seems.
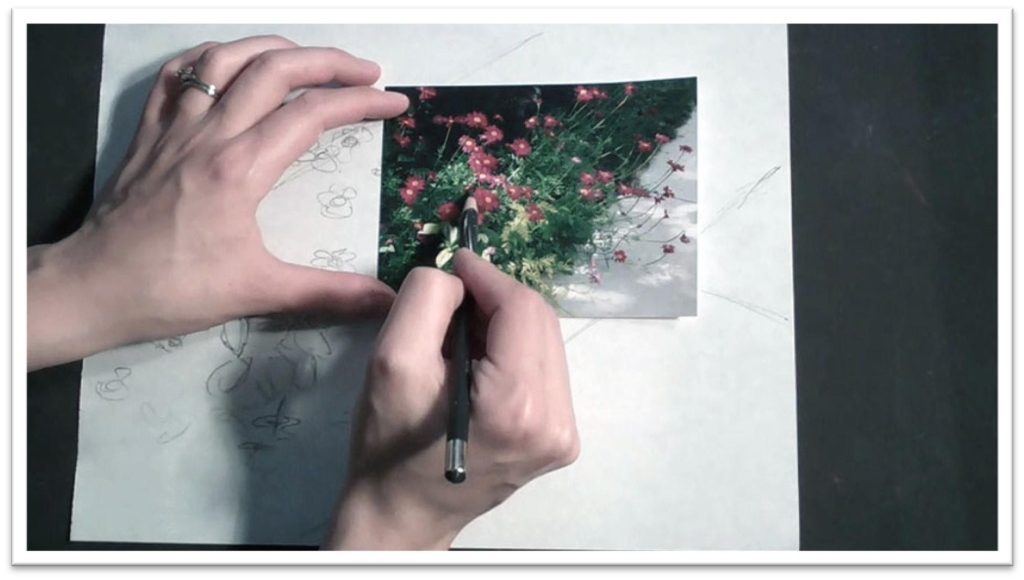
Begin with a tonal study of your painting on scratch paper, which will help prepare you for problem areas and better plan your method for painting.
In this composition, there are three large diagonal shapes of color: the dark background, the greenery in the mid-ground, and the sidewalk.
Sketch those shapes in first by seeing where the lines fall in terms of the edges of the page. Next, look for the large shapes that clusters of flowers make and put these shapes on the page before you add detail to any individual flower.
This will help keep you from getting lost in space, making randomly spaced flowers that don’t do anything to strengthen the composition.
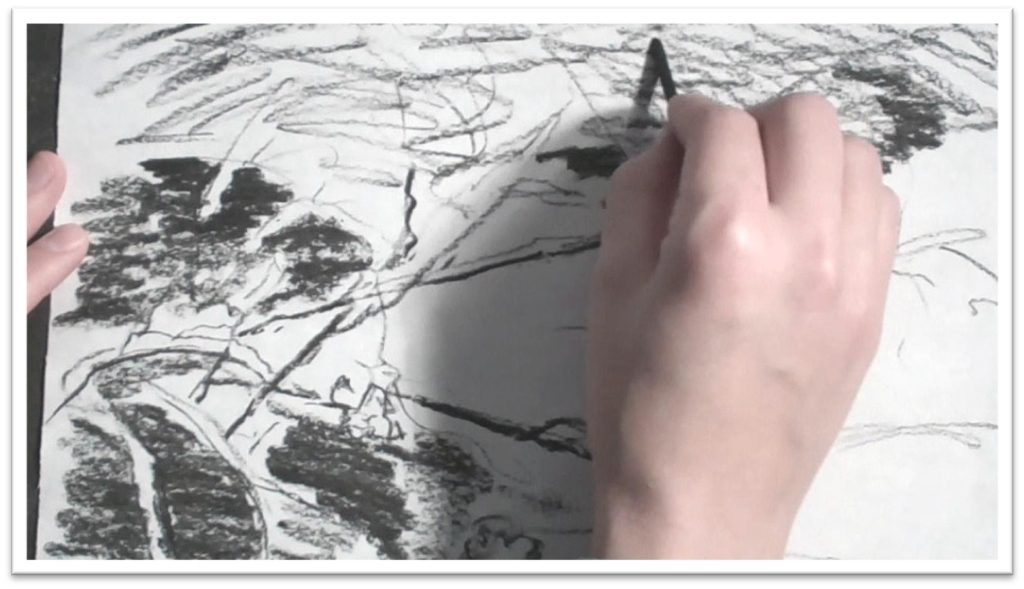
When the flowers are roughly sketched in, add the tone of the dark background with a piece of willow charcoal, working around the intricate individual petals to keep the contrast high.
The green middle tone is lighter, and the sidewalk is the white of the paper. If you wish, blend the tones smooth, then sharpen the edges of the flowers to get a good sense of how the composition balances.
When the tonal study is complete, you can begin re-drawing the sketch on the watercolor paper.
The most difficult part of placing the flowers on the paper is keeping them organized, yet random enough to be eye-pleasing.
If you squint at the reference material, you’ll be better able to see the large shapes and lines that the flowers are laying on, sort of like constellations in the sky.
Draw these paths before you draw the flowers, and you won’t have trouble keeping track of where you are or how big each flower should be.
Draw the flowers on the paths, starting with the center and then the outline of the petals. When the flowers are carefully drawn, decide which ones should be preserved with masking fluid.
In places where the flowers are lying on a light background, such as the foreground where they jut out over the sidewalk, you don’t need to bother masking. Those flowers can be painted right over the light washes of gray.
In places where the flowers lie against very dark colors or colors that need to be kept distinct, however, you need to preserve the petals with masking fluid. A needle-tipped bottle of fluid (available at on-line art stores) will be the most effective method.
Finally, fling some dots randomly on the page in areas where light is falling on the flowers and greenery.
This will help keep the painting lively, as well as preserving some lights that can be put to good effect later on as you paint leaves and stems behind the flowers.
A toothbrush works well for this. Brush your thumb across it for a light mist of dots, or bounce the handle against your finger for a more coarse spatter. Let the masking fluid dry completely before beginning to paint.
Tutorial 12
Painting a Floral Scene
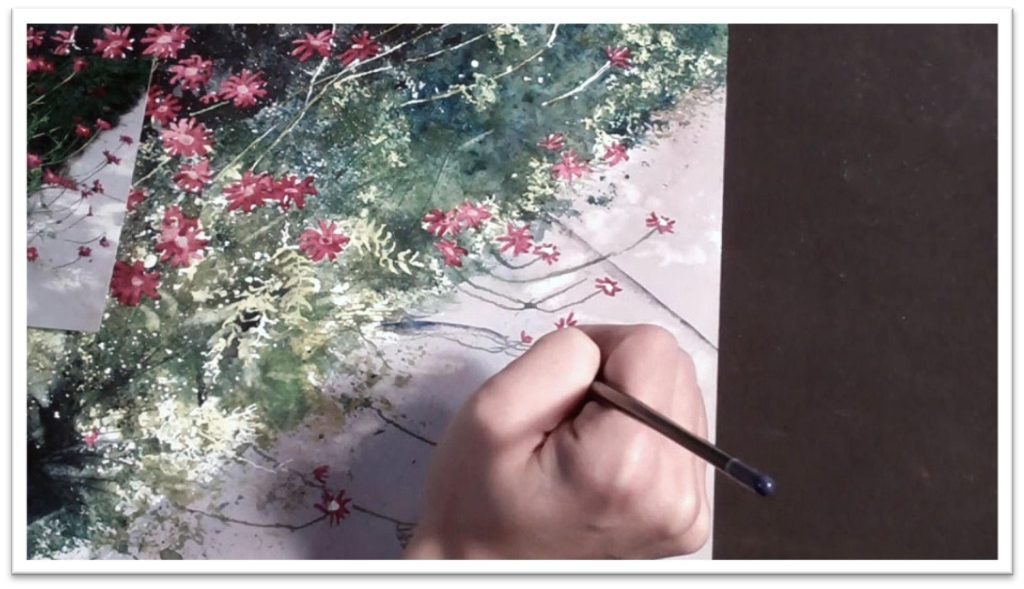
Begin the scene by laying down a wash in the sidewalk using a large a flat brush that will enable you to put the color down with as few strokes as possible.
Start with a gray, but dot in purples and blues into the wet wash to make an interesting, varied tone.
While that is drying, start work in the upper third of the paper.
Mix up a nice dark of blues and browns and put it in with a dry brush. Stamp into the wet paint with a fake leaf or scratched up mat board to get plenty of texture on the paper, then lightly spritz the area with water.
Re-add extreme darks, focusing on areas that are protected with masking fluid to increase the contrast, then tilt the board and spray the edge to get some dripping into the area where the greens will go.
As the color dries, continually re-darken as needed to make sure the high contrast areas don’t fade away.
When the sidewalk is dry to the touch but feels slightly cool, you can start adding the green middle area.
The darkest layer up on top doesn’t need to be completely dry at this point, because you want those colors to mix in with the greens somewhat.
Place the greens with stamping plates carved out of scraps of mat board and found objects.
You can paint blues and yellows right on the plate to form greens on the page, but try to place the lights and darks according to a realistic light source.
While the paint is still wet, spray it and tilt the paper to make the colors blend, and do more stamping with a fake leaf painted green.
To add another sort of texture, you can fling paint droplets right on the paper using a bottle filled with paint, then scrape through the droplets with a brush handle to start developing stems.
To clean up the grassy edge by the sidewalk and add those intricate stems, use a blunt- tipped syringe filled with green paint.
When the background color is completely dry, remove the misket, re-add misket to the centers, and add the color to the flower petals.
You’ll get a more vibrant pink with liquid watercolor inks, which can be mixed with watercolors.
Dot in a second color into the wet paint to make a somewhat mottled texture, and for flowers in the highlight path, blot the color with a paper towel to lighten it.
Paint parts of the white stems using the syringe again, keeping some areas white to make them look light-struck.
Then add the shadows on the sidewalk using two brushes loaded with the shadow color, one big for the large areas, and one small for details. Work quickly to get the shadow down in one piece that doesn’t have time to dry.
When the flowers are finished, remove the misket on the centers and paint them yellow. Take a step back, and add final detail work to the foreground as needed.
Work carefully, remembering that the eye is drawn to contrast, and that too many details can look busy and cluttered. Then, your landscape is complete.
Tutorial 13
Sketching a Sand Scene
In this class we’ll cover how to paint dimpled sand, which is very difficult subject matter.
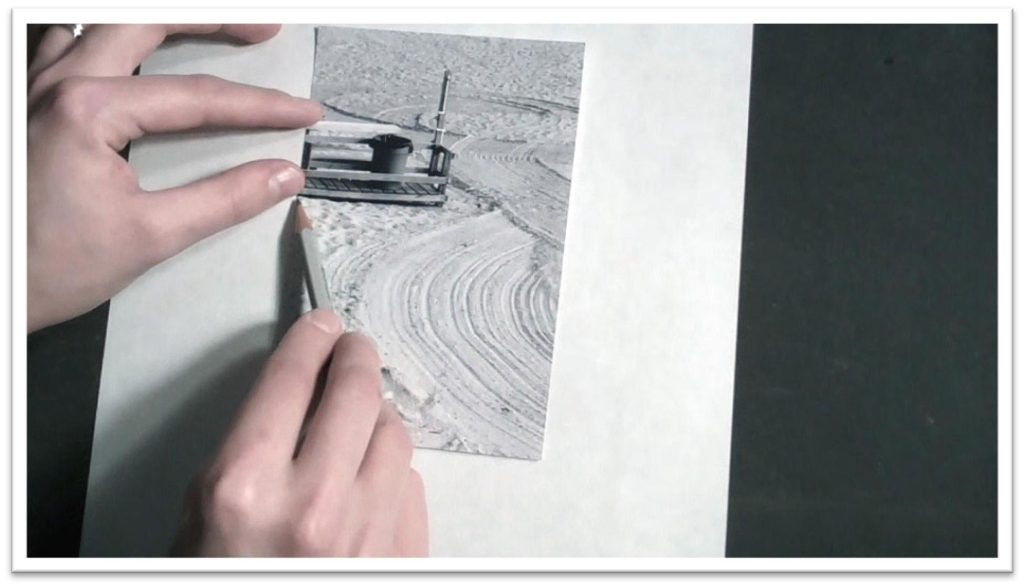
Begin with a tonal study, working from the largest shapes to the small details.
In this case, the wooden dock sticking out over the sand is the predominant structure, so draw it first, loosely to begin with.
When you’re satisfied that the shape and size of the dock is correct, tighten up the details in the boards and slats.
Sketch in the large, dominant pattern in the sand next, making sure that the arc matches the reference material to ensure that it will appear to be laying down in proper perspective.
Add tone to the drawing with a willow charcoal, adding darks in the dock, in the shadow on the sand beneath the dock, and in the lines of the sand.
There are also dark speckles in the foreground that you can quickly drop in with a stippling effect.
When the tonal study is complete, move over to the watercolor paper and transfer the dock and the other large shapes.
Make sure to erase sloppy lines and mistakes as you go, so you don’t wind up with confusing or ambiguous lines, and work with a 2H pencil so that you don’t get too much graphite in the page.
This is especially important when the color of your subject matter is light. When the dock is correctly sketched, use a triangle to make the boards perfectly straight and at ninety degree angles with the top of the page.
After the lines are placed, dip a toothbrush in a small puddle of masking fluid and spatter on a variety of dots on the foreground.
Alternate between flicking the brush to make a coarse spatter and dragging your thumb across the bristles to make a fine texture.
Some of these lights will be individual sand granules, and others will be stones and shells in the foreground.
Let the masking fluid dry completely, and then you’re ready to start painting.
Tutorial 14
Painting a Sand Scene
For the sand painting, begin by painting the foreground shape of the dock.
Use a large flat brush and lay down a tan color for the darks and mid-tones.
After that layer is dry, use a darker tone to fill in the shadow shapes.
Let the paint dry completely, then cover the dock with frisket film, which is like a clear sticker that won’t damage your painting.
With frisket protecting the lines of the dock, you can begin painting the sand. Fill two mixing cups with sand browns and yellows.
One tone should be darker than the other. Protect your painting surface with paper or old mat board, unscrew the top of your spray bottle, and put the bottom of the sprayer in the cups of paint.
Spray the entire surface with both colors of paint, then some clean water to make the colors blend.
Suck up excess puddles with the syringe, then fling some salt in the foreground to create an interesting, crystalline texture. Let that base coat dry completely, then rub off the salt.
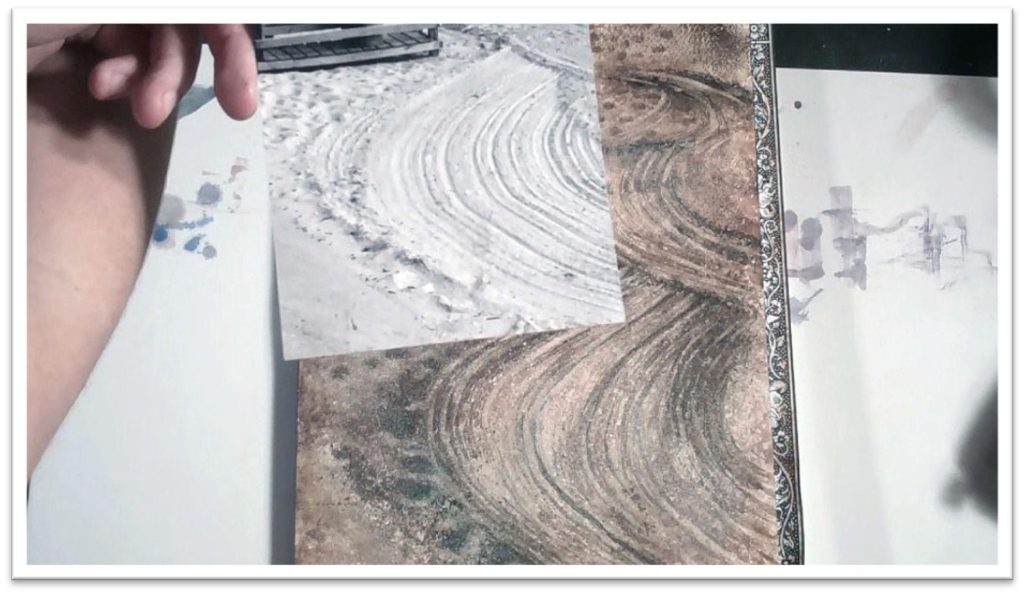
To create the patterns in the sand, use a dry toothbrush dipped in dark sand colors and drag some curving lines across the paper.
Soften the lines with a spray bottle and a damp sponge if needed. You can also use a nylon scrubber or a fan brush to do the same job.
Experiment on a piece of scratch paper to see what textures each brush will give you, and finish up the background sand patterns using the brush of your choice.
Add additional darks in the sand when the first pass is dry, working carefully to keep the lines clear.
Stipple the darks of the ridges with a fan brush, then use a large flat brush with a wet tan to smooth the sand in the left front corner.
As that is drying, add some darker color under the dock where the sand is pitted. When the dark paint is fairly dry, spritz on a few water droplets, and the color will naturally dimple just like the pitted sand.
Drop in the shadow under the dock with a flat brush while the frisket film is still in place, then use a stiff, round bristle brush to darken the inside pit of the dry dimples in the sand.
Blend the darks out with a damp brush, and lighten the upper ridge of each dimple with a damp brush and paper towel.
When the dimples and shadows are dry, remove the frisket film from the dock and touch up the lines and tones on the wood.
Fight the impulse to darken every line; a bit here and there is sufficient.
Break up some of the dark areas with a damp brush, and pick out some tiny stones from the foreground using the damp brush technique.
Then mist a fine layer of white paint or Aqua cover over the foreground sand by brushing your thumb over a toothbrush.
If you need to bring out more darks, protect the top of the painting with a paper towel and then fling some dots on the page with a round brush, then blot away any excess.
Tutorial 15
Sketching an Ocean Wave
In this class we’ll be painting a crashing wave and ocean rocks in the foreground.
Begin by sketching a tonal study, starting with the horizon line.
lace the largest shapes of jutting rocks in terms of the vertical and horizontal center of the picture plane, and then carve out the smaller details once the large shapes are correct on the page.
Make sure to include all of the major elements of the scene: the rocky inlet, dark stones jutting up into the waterline, the background mountains, and of course, the wave itself.
Add darks in the water and rocks using a piece of willow charcoal, keeping the tones dark enough so that you get a good sense of where the contrast is high.
Don’t add too many finicky details, though. Remember, if you have enough detail so that the object is readable, the eye will fill in detail for you, and the painting will look more professional.
Place the wispy clouds with the willow charcoal on the side, then blend the tone smooth to get a better idea of how it will look in context with the gray sea and black stones.
When the tonal study is complete, translate the drawing to the watercolor paper. Draw more lightly on the watercolor paper so as not to damage the tooth or make marks that will show through the paint.
A 2H pencil is a good choice for this step. As you draw, keep to the same order as you developed in the tonal study: horizon line first, then the largest cliffs, the island inlet, the wave, and then detail work in the water and rocks.
Keep your lines clear, but minimal. If the elements need to be painted to be seen, such as clouds in the sky, don’t bother drawing them. Just paint those things directly.
To preserve an interesting texture on the rocks and to protect them from the colors of the sea when the painting starts in the next stage, dip a piece of mat board into a pool of masking fluid, then stamp the cliffs liberally.
Work quickly, since the masking fluid will soon become gummy and lift off as it sticks to the stamp.
Let the mask dry completely, and you’re ready to start painting this scene.
Tutorial 16
Painting an Ocean Wave
Before you paint a cresting wave, prepare a squirt bottle with clean water, another with dark blue, and a third with green appropriate for the ocean.
Paint a dark mixture of yellows, reds, purples, and blues where you want the wave to be, then, before that mixture can dry, squirt a fine line of water under the upper edge to make a wave form right on the paper.
Use a dry brush to direct excess blues into the surrounding sea, then go back and forth, darkening the wave and squirting more water until the wave looks correct. Let that dry completely.
Next, dampen the sky area with a big flat brush. By painting water first, you retain more control, because the paint will flood the water area but not dry paper.
Squirt sky colors into the wet surface with the syringe and move the paper back and forth to make the colors bleed into each other.
If it’s too dark, lighten and drag through the colors with a paper towel.
When you’re ready to make sea foam, whisk up some fine bubbles with baby shampoo in a container of water, and use a fork to drop the froth on the paper.
Use an eye dropper to color the bubbles, let that dry completely, and see the interesting pattern that results.
Use a large flat brush to paint the mountain range in the distance with as few strokes as possible.
When the first color is still wet, drop in some different hues to keep it from getting flat, then, as that dries, you can move to the foreground and soften the rocks and water. Use a damp brush to take up color and a paper towel to blot it further.
Before taking off the misket in the rocks, sponge on yellows and siennas as a base tone. You can fill a sponge and squeeze on color from a distance or sponge the paint on directly.
Use a brush to clean up lines in the foreground that need to be kept more distinct, then let the color dry and remove the masking fluid.
If you want to lighten the sea foam, use the same baby shampoo bubbles technique again, but drop on watered down Aquacover instead of paint.
Let that dry, then sponge more color onto the rocks without the masking fluid.
Paint the rocks of the foreground inlet that jut into the sea foam using a flat brush with plenty of dark paint to ensure that the Aquacover is well covered.
Add rocks that are in the water with the corner of a flat brush, and blot color out if needed with a damp brush.
Add shadow shapes to the rocks, breaking up the large shapes into smaller individual rocks by adding dark lines here and there.
Break into the foamy area by using a flat brush with a gray blue, and finally, wash over any busy areas with a flat brush of dark blue to combine small shapes into larger, more eye- pleasing ones.
When you think the painting is done, put it away for a few days, and come back to it with fresh eyes. Mistakes and areas to clean up will pop out at that point.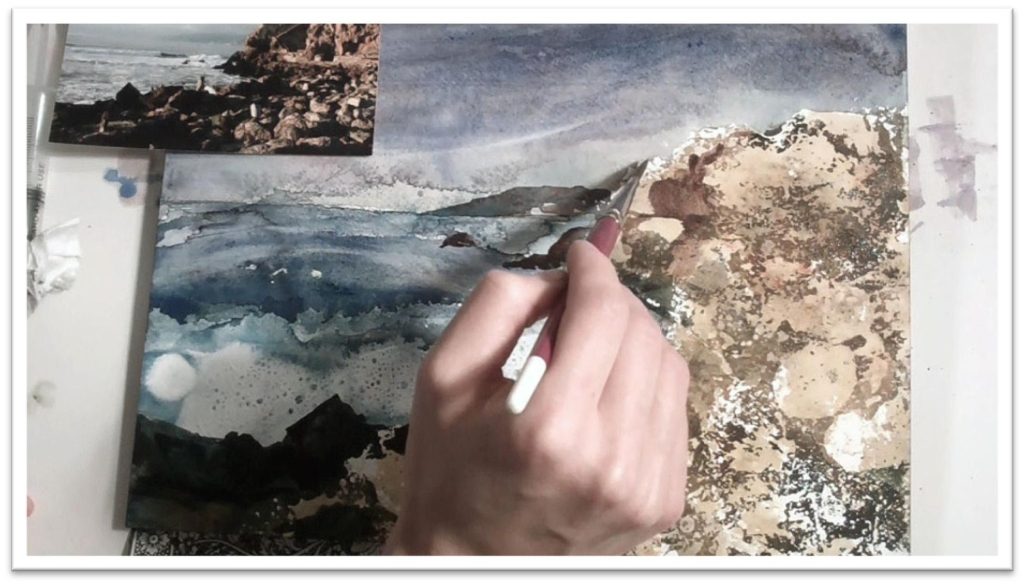
Tutorial 17
Sketching A Sunset Seascape
Painting a sunset in watercolor is difficult, because you need to get a gradual transition in the color that ring the sun and affect the dark foreground without layering.
Because watercolours are transparent, lights can’t cover darks.
With that in mind, careful planning in the sketching phase becomes crucially important.
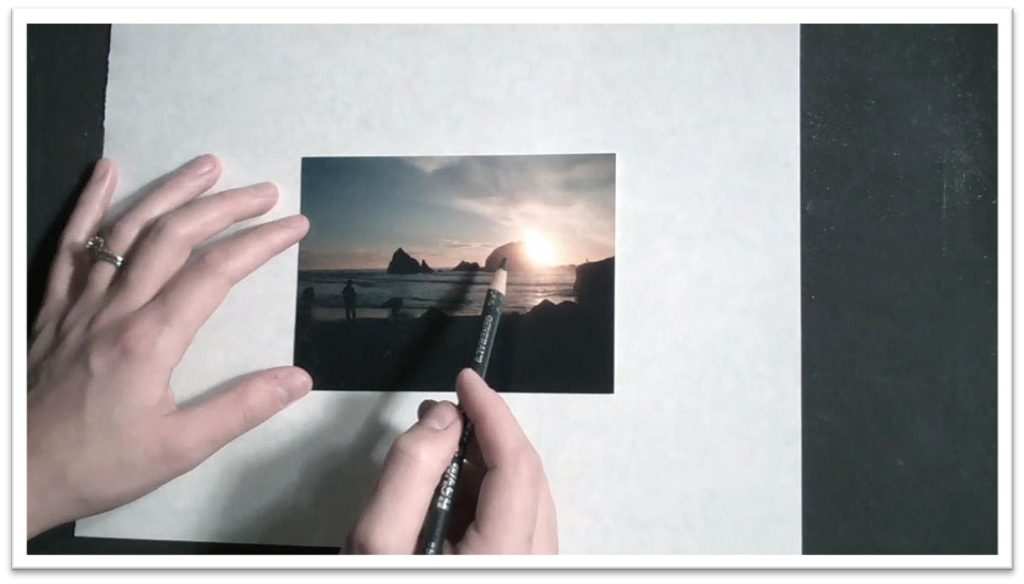
Use a piece of scratch paper in the same basic dimensions that you want the finished piece to be to make a tonal study of the scene.
Start with the horizon line, then place large objects and land masses in terms of the vertical and horizontal centers on the picture plane.
Draw the rocky mountains, the shore line, and the sun with sketchy, loose marks using a willow charcoal stick.
When you drop in the figures standing on the shore, start with the heads and fill in the body and legs in proportion to it.
Then add the tone to the foreground with the willow charcoal. The rocks that jut up from the sea are equally dark, and you should be able to see some shadows in the waves to indicate water.
Step back from the composition and see if there are any objects lining up badly. For example, in the sample study the mountain looked like a giant hat sitting on one of the foreground figures.
Make adjustments as necessary, and when you’re satisfied with the composition, translate the drawing to the watercolor paper.
For the sunset painting technique, a larger piece of paper will be an asset, so you may want to upgrade to a larger pad for this session.
Sketch in the horizon line, the shore, jagged rocks, and the figures again, but use a 2H pencil and work lightly so as not to indent the paper.
Clean up any lines that are loose or sketchy as you go, so that you’ll have a nice, clean roadmap to work from when you start painting.
On the rocks in the distance, make the jagged edge very crisp and clear. Keep the sun itself very clean and bright, since the centre will be represented by the white of the paper.
You may even want to mask off a small portion of the centre to keep the middle perfectly bright and clean. In that case, a circle of frisket film will work nicely.
Tutorial 18
Painting a Sunset Seascape
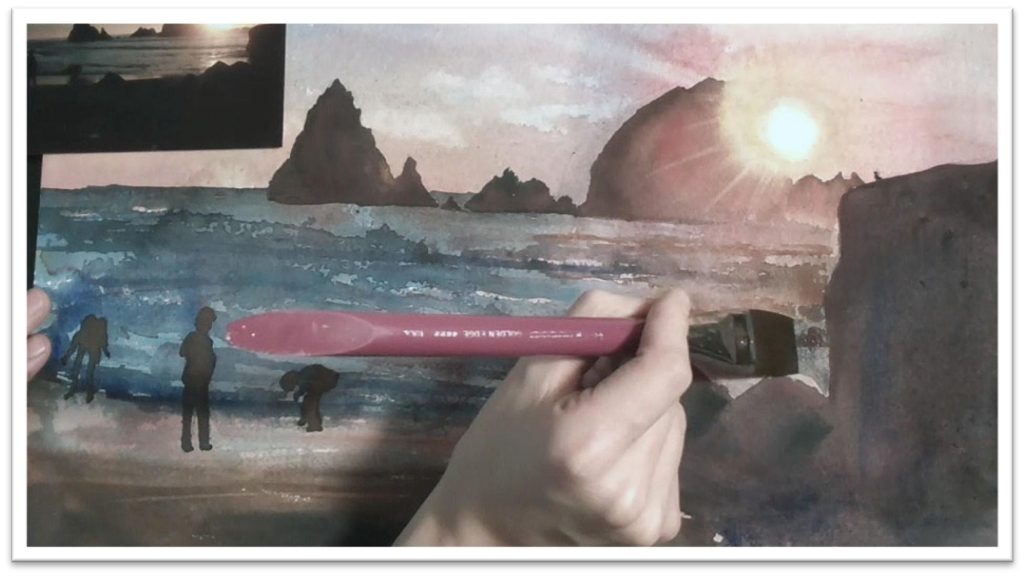
After protecting the sun with a small circle of frisket film, begin painting the sunset.
Mix up three cups of colors: one of cobalt blue, one winsor red, and one winsor yellow.
Paint the colors around the center of the sun like a target, first the yellow, then the red, then the blue around the outside.
Make sure you have plenty of color on the page so that it won’t fade away.
Continuously tilt the paper as you spray the sunset with water until the bulls eye becomes a nicely blended tone, then add some blue in the sky and some oranges and yellows in the horizon with a syringe. Work until you’re satisfied with the colors.
When the paper is fairly dry, use a damp sponge to blot out the wispy clouds and the rays of the sun.
In areas that are more dry, you can use a dry paper towel to lift out clouds as well.
Spritz on a few droplets in the water to keep some interesting texture in play, then leave the paper flat until it has dried completely.
Now use a big flat brush and lay in some dark gray/blue tone at the water edge. Use a syringe of clean water to move that paint around, then add some cerulean blue and tilt the page to let those blues mix.
Blot up some of the color in the right side of the sea beneath the sun and add some oranges and yellows. Direct any excess paint up into the mountains.
When the ocean is completely dry, start adding the jutting mountains. Use a large flat to lay down the dark, then touch the side with a golden yellow while the paint is still wet to make it look like the sun is hitting it.
When you come to the mountain right by the sun, lay in one base tone, wash across the edge with clean water to keep a soft transition beside the sun, then drop in some more intense reds and yellows.
Peel the frisket off the sun and blend the stark edge out into the rest of the sun’s rays, then do the final work in the water.
Use a syringe to fling dark blue paint, then touch the line with a damp brush to break it into more interesting patterns.
You can sprinkle the surface with water to develop an interesting texture; it will only affect the wet paint, so it won’t hurt the sky that you’ve worked so hard on.
When the sea is completely dry again, paint the foreground mountains. Use a calligraphy pen dipped in the dark paint to make the tiny bird perched on the hill.
Drag some browns and tans into the foreground to make the sand stand apart from the rocks, let that dry, and paint the shoreline.
Let the beach dry, then use a small round brush to add the figures standing on the sand.
Touch the wet dark color with tans and reds to make it look like the sun is hitting them. The last step is to do finishing work in the water if necessary.
Darken some lines in the waves, and use the misket needle tool to add some sparkles on the water’s surface. Let that misket dry, then wash over the water again with some darker paint. When the misket is removed, the highlights will pop out.
You can even accent them by dragging a dry brush of Aquacover over the rough surface.
The brush will skip, making the speckled look you need for sparkles on water.
Tutorial 19
Sketching Ice
The last class in this series is the most challenging.
We’ll be tackling ice, which is very difficult subject matter considering that it is colourless, yet filled with reflected color and bright highlights.
Study your subject matter closely before beginning to better understand the particular ice that you’re painting.
Different ice has different texture. This scene will focus on an iced over flower stem and petals, which has a clear, yet bumpy texture.
Begin with a tonal study in willow charcoal. This will help you to organize the random, chaotic grouping of stems and leaves and familiarize yourself with how the ice is forming over the plants.
Sketch the lines first, and then add detail to the foreground twigs. Darken the stems that need the most emphasis and sketch the hump of ice on the top, then cross hatch loose lines in the background to vaguely indicate the shapes that you see there.
Darken up some of the negative shapes to help better define the plants in the foreground, and when the tonal study has been pushed as far as you like, transfer the lines to the watercolor paper.
Use a harder pencil for the watercolor paper and work lightly. Even in this sort of scene, there are still large, dominant shapes and smaller ones: focus on placing those dominant twigs in the front first, then add the flowers and ice around the twigs, and then any background shapes that you want to keep.
When the drawing is detailed enough for you to work from, add masking fluid to the ice.
The easiest way will be to use a masking pen, though you don’t have to go as fine as the needle tipped version.
Concentrate on keeping the ice shapes defined, but not completely filled in; a lot of the ice is gray or has colors from the background.
Make sure, too, that you apply the fluid using the same rippled pattern in the upper line of the ice that you see in the reference material. Let that dry completely, and you’re ready to paint.
 If you wish to download the files to your desktop, simply right click the link below and select ‘save as’
Then select the location you wish to save the files to (either your DESKTOP or MY DOCUMENTS e.t.c.)
Once finished, simply unzip the files (PC use winzip, MAC use stuffit) and your files will be there.
All written material can be opened as a PDF.
All videos files can be opened with VLC Media Player.
Select your download option below …

