Frisket film is available at many art and hobby stores, generally wherever airbrushing materials are sold.
It is essentially a clear, low-tack sticker.
It can be cut easily with scissors or exato knives and applied to paper, drawin over, then removed.
Use it in your drawings to achieve clean, precise lines and both positive and negative shapes.
To preserve a highlight: such as in an eye, or anywhere else that requires a lot of medium and needs to be kept white. Draw the eye, including the shape of the highlight.
Trace the highlight onto the frisket film, cut it out, and apply to the paper. Use a piece of paper to tamp it down, not your finger.
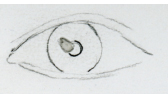
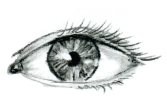
Work up the eye completely, including placing the pupil with darkest dark you can, then use an exacto blade to very carefully lift the frisket.
You may need to re-shape the highlight, but if you’ve done it well, it should be perfectly white.
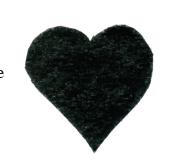
To create a positive shape: Whenever you draw a light-toned object sitting on a dark background, it’s a good idea to preserve the shape of the object so that you can lay the background in cleanly, without making directional strokes or outlining.
Simply draw the object, trace it onto frisket, cut and place the frisket, and lay the darks in right over the top.
To create solid darks, blend over the medium with a tissue or cloth. Spray the background with fixative before you peel up the frisket to minimize smudging.
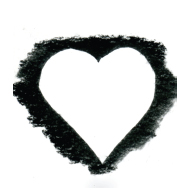
To create negative shapes: When you have a dark object sitting on a light background, follow the same procedure, but use the frisket that is left after cutting the shape.
You can also create straight lines of contrast by laying frisket on one side of the line.
This technique comes in particularly handy when you’re drawing shelves, counters, tables, boxes, or other man-made objects.

 Want To Learn More…
Learn how to draw portraits like a master with our latest portrait mastery drawing course.
It’s just like having your own drawing teacher guide you step-by-step along the way without the expensive price tag.
No more smudgy mess with black and white that looks like a first grader whipped up in art class.
“Portrait Mastery” is generously illustrated showing you step-by-step just how to create a real life portrait.